Disclosure: This article contains affiliate links. I may earn a commission at no extra cost to you.
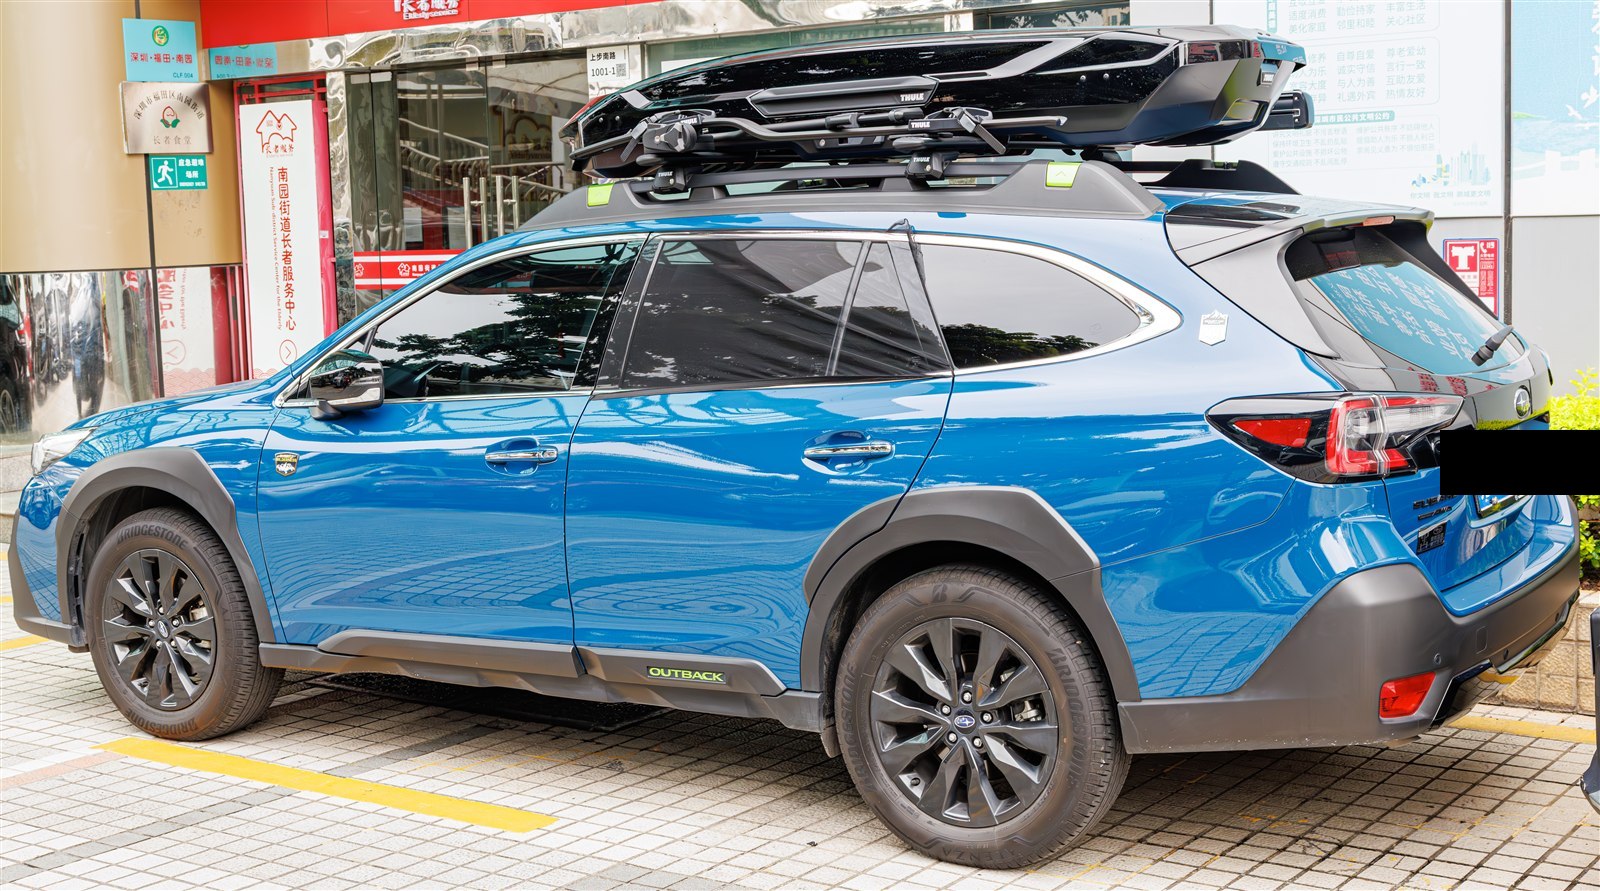
The Outback has the longest roof of the three current Subaru models, and it’s the one most often loaded up for road trips and camping. That combination means Outback owners tend to size up faster than Forester or Crosstrek owners — a box that looks oversized on a shorter roof usually still leaves room to spare on an Outback.
Capacity isn’t the only variable, though. Here’s how to pick a size that actually fits your Outback and your hatch.
Quick Picks
Best for most Outback owners: Thule Motion XT L — around 18 cubic feet, the practical default for road trips and camping gear.
Best alternative brand: Yakima SkyBox 18 — same size class, worth comparing if you prefer Yakima’s mounting hardware.
Best for families: Thule Motion XT XL — steps up capacity for families or gear-heavy trips.
Best for extended trips: Thule Motion XT XXL — maximum capacity; verify hatch clearance before buying.
For most Outback owners, an 18-cubic-foot box like the Thule Motion XT L covers the common case — road trips, camping gear, and family travel — without adding more roof bulk than necessary. The Yakima SkyBox 18 sits in the same class if you’d rather buy Yakima.
Sizing Up: Where the Long Roof Pays Off
This is the one upgrade where the Outback has a real edge over the other two Subaru models. Its longer roof gives an XL box more room to sit without crowding the windshield or overhanging the hatch as much as it would on a shorter vehicle. For families or anyone who regularly runs out of room, the Thule Motion XT XL is worth the extra size — and if you’re packing for extended trips, the Thule Motion XT XXL is about as large as it makes sense to go.
Hatch Clearance Is the Real Limit, Not Cubic Feet
Two boxes with similar capacity can have very different lengths, and length — not volume — is what causes hatch interference. The Outback’s long roof gives more room to work with than a Forester or Crosstrek, but a box mounted too far back can still catch the hatch on the way up. Adjusting crossbar spread and sliding the box forward usually solves it without needing a smaller box.
Outback vs Forester vs Crosstrek Cargo Box Sizing
Model
Roof Length
Loading Height
Realistic Ceiling
Outback
Longest of the three
Moderate
XL boxes, with room to spare
Forester
Moderate
Tallest — more reach to load
Large; XL adds real loading effort
Crosstrek
Shortest, narrowest
Lowest, easiest to reach
Medium-Large; XL is a stretch
The Outback is the one Subaru where sizing up rarely causes problems — the roof length absorbs it. On a Forester or Crosstrek, the same box demands more attention to positioning.
Cargo Box Size by Outback Generation
The 2010-2014 (fourth-gen) and 2015-2019 (fifth-gen) Outbacks both handle medium and large boxes comfortably, with XL sizes requiring closer attention to hatch clearance. Current-generation (2020-present) Outbacks offer the most flexibility of the three, including XL boxes with proper fitment. The Outback Wilderness shares the same roof dimensions as the standard Outback, but its taller ride height makes loading slightly more work — worth factoring in if you load solo.
Common Mistakes Outback Owners Make
Buying XL “just in case.” A bigger box adds wind noise and weight year-round — size for what you actually carry, not the one trip a year that needs more.
Ignoring box length in favor of cubic feet. Two boxes with the same capacity can have very different hatch clearance.
Leaving the box mounted year-round. It adds drag and noise even empty — worth removing between trips.
FAQs
What size cargo box fits a Subaru Outback?
Most Outbacks comfortably run 15-20 cubic feet, and many can size up to 21+ with proper hatch clearance — the long roof gives more headroom than a Forester or Crosstrek.
Can an Outback fit a 21+ cubic foot box?
Yes — the Outback is the most forgiving of the three Subarus for XL boxes, though hatch clearance is still worth verifying before buying.
Does the Outback Wilderness fit the same box sizes?
Yes, the roof dimensions match the standard Outback. The taller ride height just makes loading a bit more work.
Does a larger box hurt gas mileage?
Yes. Larger boxes add aerodynamic drag and are most noticeable at highway speeds — one more reason to size for typical use, not the biggest trip of the year.
Final Thoughts
The Outback’s long roof makes it the easiest Subaru to size up for road trips and family travel — an 18-cubic-foot box covers most owners, and stepping up to XL rarely causes the hatch and clearance problems it would on a shorter vehicle. Match the size to what you actually carry, and double-check hatch clearance once it’s mounted.
Interior clutter builds up fast. Small items pile up, get buried, and the space becomes harder to use.
Most setups fail because they don’t match real use. Too many compartments or poor fit just add friction.
The goal isn’t to organize everything. It’s to keep what you use most easy to reach and the rest out of the way.
This guide focuses on what actually works for Crosstrek, Forester, and Outback owners in daily use.
Quick Setup Examples
Most people don’t need a complicated setup.
For daily use, a simple combination usually works best:
• Outback center console organizer • Forester center console organizer • Crosstrek center console organizer • Side pocket seat gap organizer • Drive Auto Products trunk organizer
For families, adding a seatback organizer helps keep items contained without taking up floor space.
What Actually Matters When Choosing Interior Organizers
Fitment (Universal vs Subaru-Specific)
“Universal” organizers rarely fit clean.
Console shapes vary by model and year, so generic designs often leave gaps, sit uneven, or shift during use. They technically fit, but don’t feel built for the space.
Subaru-specific organizers match the shape better. They sit flat, stay in place, and use the space more efficiently.
In real use, better fit means less movement and easier access. That matters more than whether it’s labeled universal.
Flexibility vs Structure
Interior organizers fall into two types: soft and rigid.
Rigid organizers hold their shape and keep items separated. They stay in place and make compartments predictable, which works well for daily use.
Soft organizers are more flexible. They’re easier to adjust, remove, or work around when you need the space.
In real use, structure works best for consistency. Flexibility matters when your setup changes often or space is tight.
Accessibility (This Is What People Miss)
Accessibility matters more than storage.
If items are buried, you won’t use them. Easy reach makes a bigger difference than more compartments.
Visibility matters too. If you can’t see it quickly, it slows you down.
In real use, simple and visible works best.
Daily Use vs Occasional Use
Not everything needs the same setup.
Everyday items should be easy to reach and quick to use. Occasional or emergency items can be stored out of the way, but still accessible.
In real use, mixing them causes problems. Daily items get buried, and important items are harder to find when you need them.
Keep them separate.
Types of Interior Organizers (What You Actually Need)
Center Console Organizers
These are for small items that build up fast.
Keys, cards, cables, and loose items tend to pile up in the console. Without structure, they get buried and harder to find.
A simple organizer keeps things separated and easy to grab.
They help control groceries, separate gear, and keep smaller items from sliding around. That makes the trunk easier to use without constant rearranging.
Once you start carrying gear regularly, the overall trunk setup matters just as much as the organizer itself.
In real use, the benefit is keeping the space usable. Items stay in place, and you still have room for larger loads when needed.
A console organizer plus a small trunk organizer covers the basics without overcomplicating the space. It keeps everyday items contained while leaving everything else open.
In real use, it’s easy to manage, easy to reset, and doesn’t get in the way.
Balanced Setup (Best Overall)
This setup covers the main problem areas without overdoing it.
A console organizer handles small items, seat gap storage keeps essentials within reach, and a trunk organizer controls larger items.
In real use, it keeps things organized across the whole car while staying simple and flexible.
Family Setup
This setup focuses on access and easy cleanup.
Seatback organizers keep items within reach for rear passengers, while a trunk system handles bulkier items and mess.
This becomes even more important once dogs, muddy gear, or everyday clutter start affecting the rest of the cabin.
In real use, it keeps things contained and easier to manage without constant cleanup.
Gear / Work Setup
This setup is built around the trunk.
It uses more structured storage to keep tools or gear in place and easy to access. The front cabin stays mostly clear.
In real use, it prioritizes stability and organization where it matters most.
Subaru Model Differences (Important for Fitment)
Outback
The Outback has more interior length, which makes it easier to organize.
There’s more room up front and in the trunk, so items can be spread out instead of stacked.
In real use, that means more flexibility and easier access.
Forester
The Forester has a taller cabin, which works well for vertical storage.
You can stack items more easily without losing space. The tradeoff is less length, so spreading items out isn’t as easy.
In real use, it favors stacking over flat layouts.
Crosstrek
The Crosstrek has a smaller interior, so space needs to be used efficiently.
There’s less room for extra containers or loose items. Without tighter organization, things pile up quickly.
In real use, simple, compact setups work best.
Where Most People Go Wrong
Trying to Organize Everything
Trying to organize everything usually backfires.
Too many compartments and systems add complexity without solving the problem. You end up managing the setup instead of using it.
In real use, simpler setups work better. Focus on what you use most and leave the rest flexible.
Using the Wrong Type of Organizer
Using the wrong type creates more problems than it solves.
Soft organizers don’t hold shape when you need stability. Rigid ones can get in the way if you need flexibility. Oversized organizers waste space and limit what you can carry.
In real use, the match matters. Choose based on how you use the space, not just what fits.
Ignoring Daily Habits
A setup that doesn’t match your routine won’t work.
If it’s built around ideal use instead of real use, items get misplaced, buried, or ignored.
In real use, the setup should follow your habits. What you use most should be easiest to reach.
Blocking Access or Visibility
If it’s hard to reach or see, it won’t get used.
Organizers that block access or limit visibility turn into dead space. You end up ignoring them or moving things around just to get what you need.
In real use, easy access and clear visibility matter more than extra storage.
What Actually Works (Based on Real Use)
Keep Front Storage Simple
Keep only essentials up front.
Too much in the front cabin creates clutter and makes items harder to find. It also gets in the way while driving.
Keeping the interior easier to clean matters too, especially once dirt, water, or winter mess starts building up around the floor.
In real use, less is better. Keep what you use daily within reach and leave the rest elsewhere.
Use the Trunk for Bulk Items
Keep bulk items in the trunk.
Larger items quickly clutter the cabin and make the space harder to use. Moving them to the trunk keeps the front area clear and easier to manage.
In real use, this keeps the cabin clean and focused on what you need while driving.
Combine 2–3 Organizer Types Max
Limit the setup to a few organizer types.
Adding too many creates clutter and makes the system harder to use. You end up managing the setup instead of using it.
In real use, two or three well-placed organizers are enough to keep things in place without overcomplicating the space.
Prioritize Easy Reset
Your setup should be quick to clear and reset.
If it takes effort to clean up after a trip, it won’t happen. Items will build up and the space becomes harder to use.
In real use, simple setups win. Easy removal and quick resets keep things manageable.
Most issues come from locking into a setup too early.
FAQs
Do interior organizers actually make a difference?
Yes, if they match how you use the car.
What’s the most important organizer to start with?
Usually the center console or trunk.
Are Subaru-specific organizers better than universal ones?
Often, yes. They fit better and stay in place.
How many organizers should you have?
Usually 2–3 max.
What’s the best setup for families?
Seatback plus trunk organizers.
Final thoughts
There’s no perfect setup, just what fits how you use your car.
More structure keeps things in place. More flexibility keeps the space usable. The right balance depends on your routine.
Keep it simple. Focus on fit, access, and using only what you need.
It also helps to think about how the rest of the vehicle works together. Trunk storage, floor protection, and dog setups all affect how usable the interior feels day to day.
For most Subaru owners, a simple setup is usually enough:
• Outback center console organizer • Forester center console organizer • Crosstrek center console organizer • Side pocket seat gap organizer • Drive Auto Products trunk organizer
This keeps the cabin usable without overcomplicating the space.
Disclosure: This article contains affiliate links. I may earn a commission at no extra cost to you.
Quick Picks: Best Trunk Storage Products for a Subaru
• Best rigid storage: Rubbermaid ActionPacker Storage Box (Amazon)
• Best soft organizer: Drive Auto Products Trunk Organizer (Amazon)
• Best cargo liner: Motor Trend FlexTough Cargo Liner (Amazon)
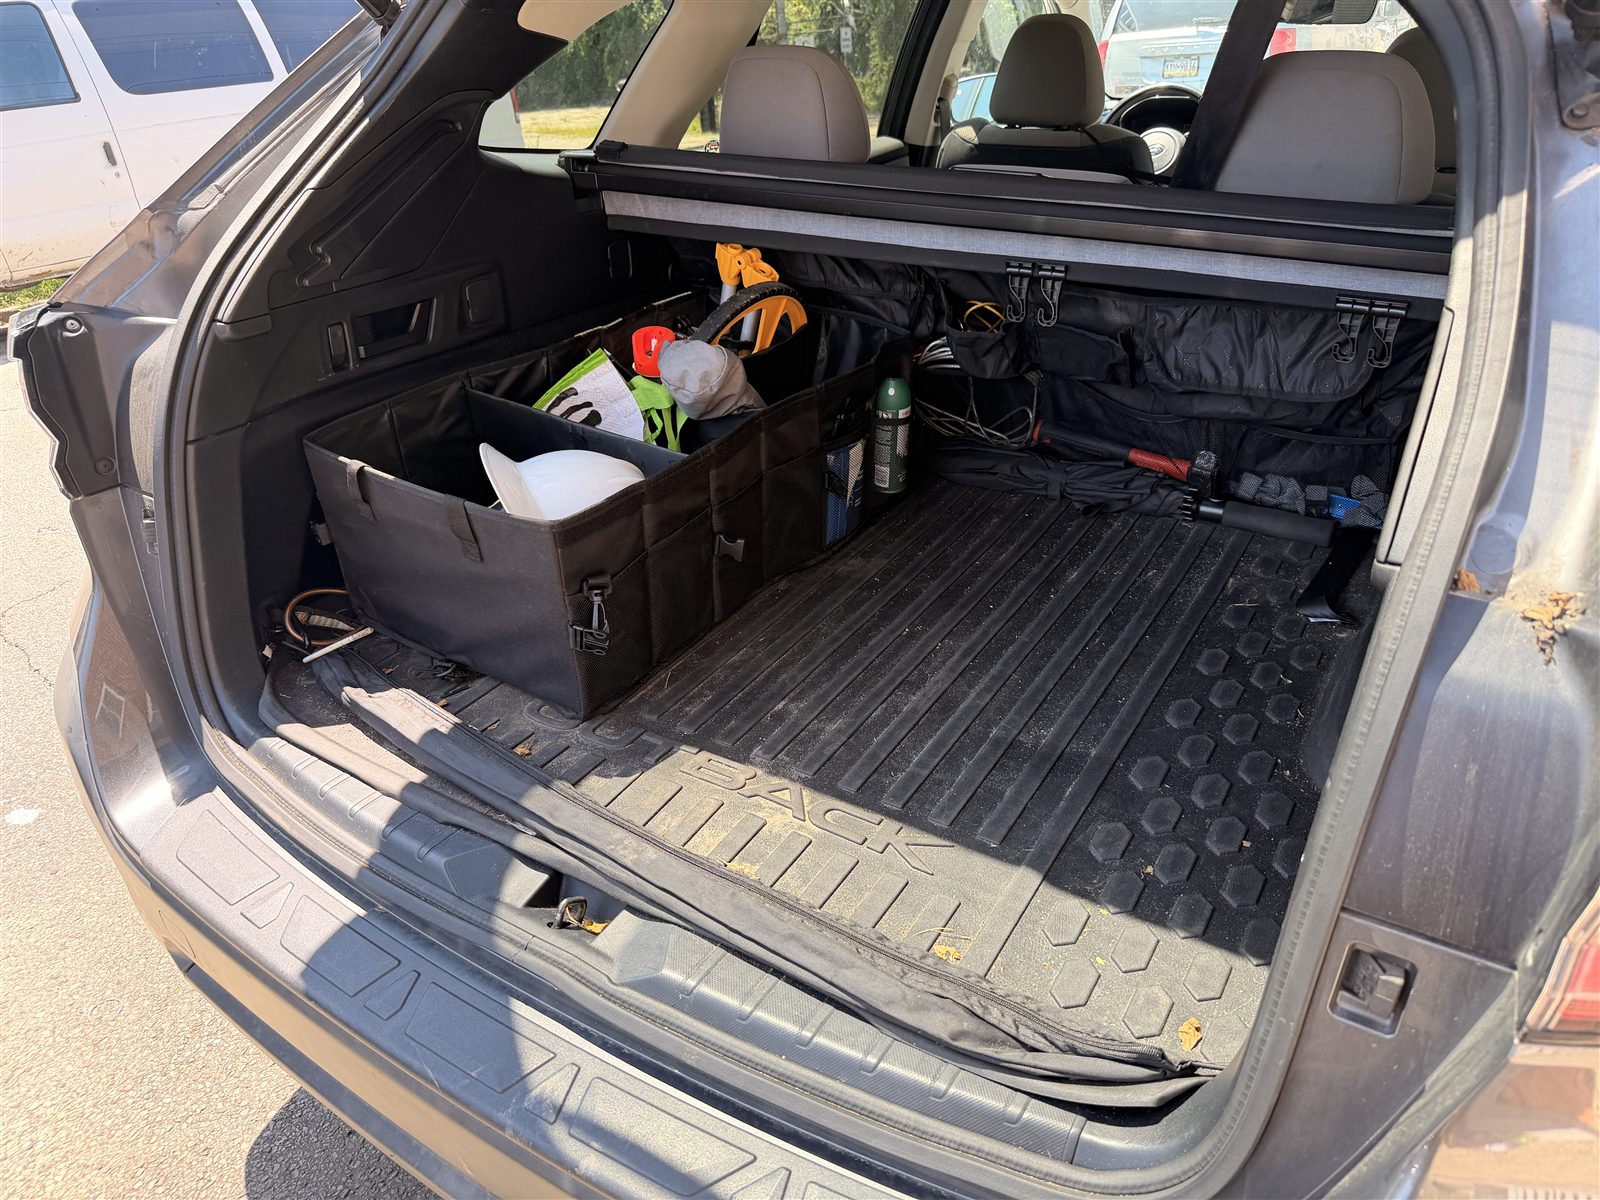
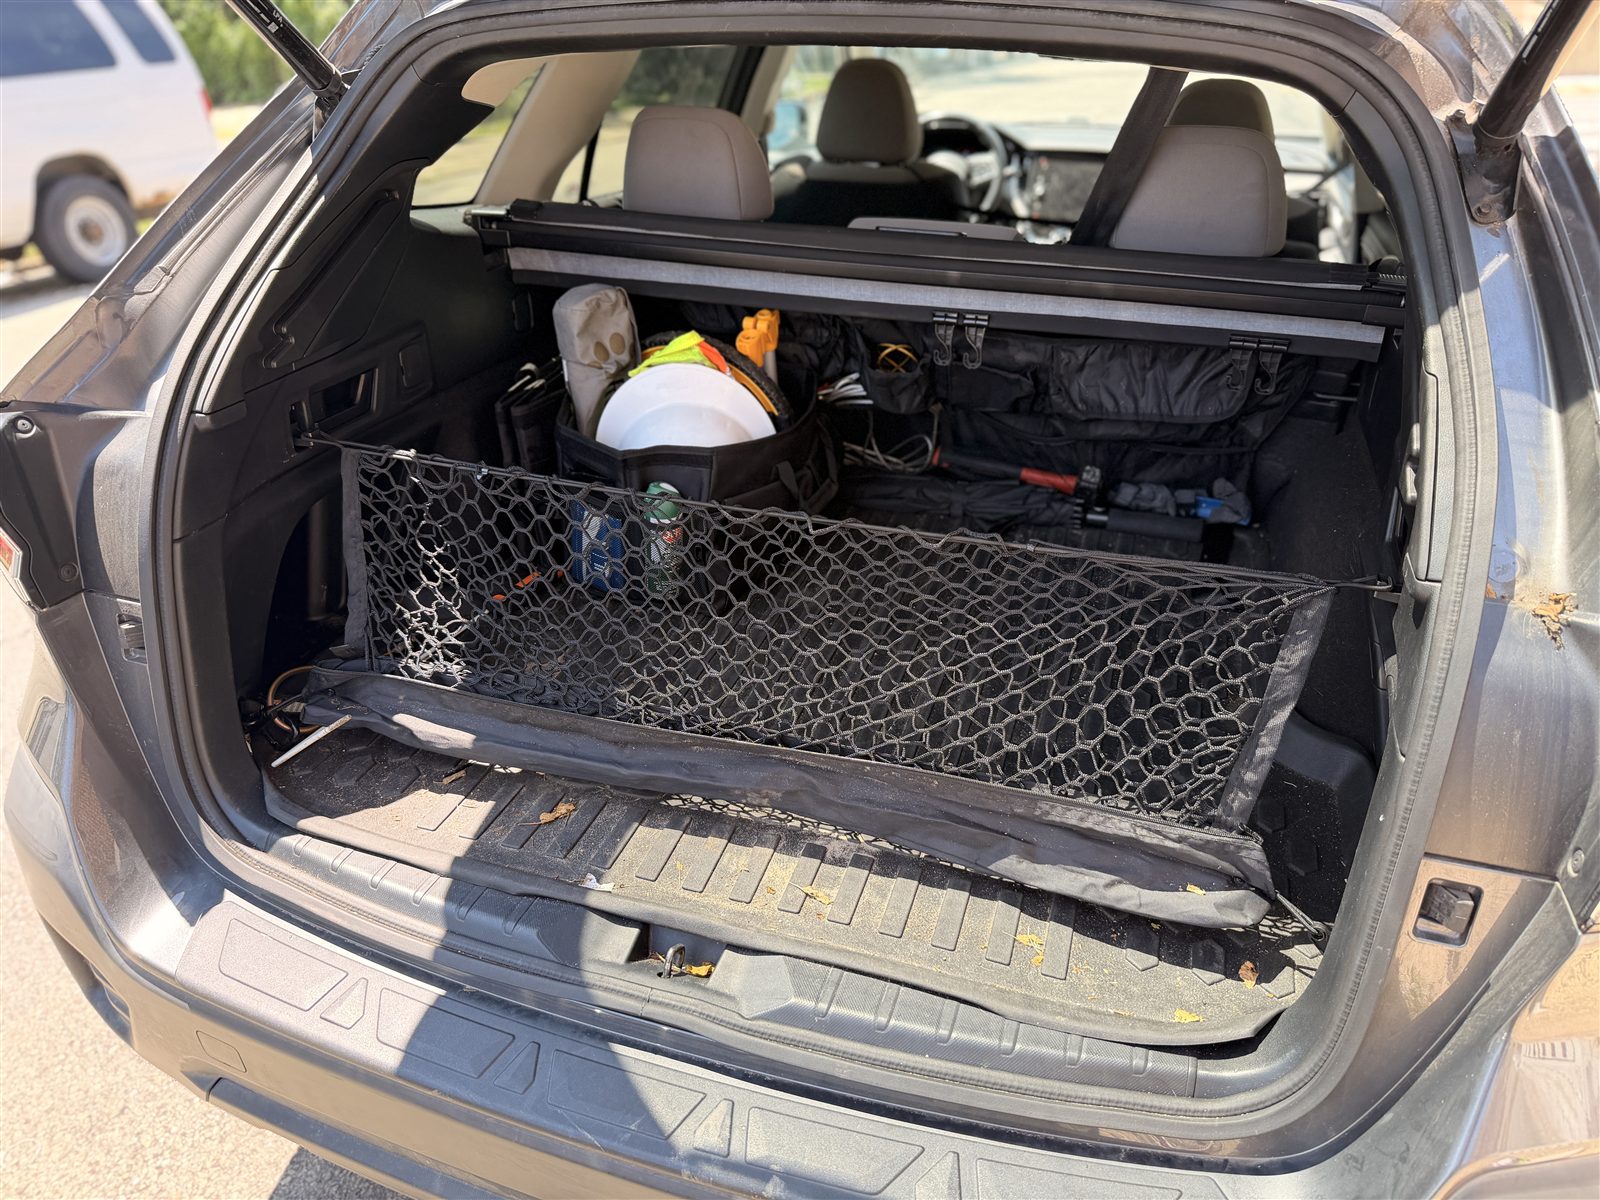
Subaru trunks offer a lot of open space, but that doesn’t always work in daily use. Once you start loading groceries, gear, or everyday items, things shift and mix together.
Most people don’t fix it because they want to keep the space flexible. Fixed setups can get in the way, so the trunk stays unorganized.
The goal isn’t a perfect system. It’s something simple that keeps items in place and easy to access without limiting the space.
This guide focuses on what actually works for Crosstrek, Forester, and Outback owners in real use.
The Real Problem With Subaru Trunks
Open Space Sounds Good… Until You Use It
Subaru trunks are open by design, which works until you start using them daily.
Without compartments, everything shifts. Groceries slide, bags tip over, and smaller items move around after even short drives.
The issue isn’t space. It’s lack of structure.
Different Types of Clutter
Not all trunk clutter is the same, and treating it the same is where setups fall apart.
Daily items like groceries and bags need easy access and tend to move the most.
Occasional gear like sports equipment or tools is bulkier and usually stays put longer.
Emergency items are rarely used but need to stay accessible when you need them.
In real use, the issue isn’t just clutter. It’s mixing everything together. Without separation, small items get lost, larger items shift, and nothing stays organized.
Why Most People Don’t Fix It
Most people leave the trunk as-is because they don’t want a permanent setup.
The space needs to stay flexible, and fixed solutions can get in the way. There’s also uncertainty around what actually works, so it’s easier to deal with the mess.
In real use, the goal isn’t a perfect system. It’s something simple that works without limiting the space.
What a Good Trunk Setup Should Do
If you want a simple setup that actually works:
Everyday items → [Drive Auto Products Trunk Organizer]
More structure → [Rubbermaid ActionPacker Storage Box]
To reduce sliding → [Motor Trend FlexTough Cargo Liner]
Keep Items From Sliding
Stability matters more than capacity.
Most trunks have enough space, but without structure, everything moves. Even light items shift during normal driving, which turns a full trunk into a mess.
In real use, keeping items in place makes a bigger difference than adding more storage. A setup that limits movement is easier to use and keeps things where you expect them.
Stacking everything vertically might use space efficiently, but it makes daily use harder. You end up moving multiple items just to reach one thing.
In real use, a flatter layout works better. Keeping items visible and within reach saves time and keeps the trunk usable without constant rearranging.
Stay Flexible for Different Uses
Your trunk needs to change with how you use it.
One day it’s groceries, the next it’s gear or something bulky. Fixed setups can get in the way and limit what you can carry.
In real use, flexibility matters more than a perfect layout. A setup that can adjust or clear out quickly keeps the space usable without adding friction.
Be Easy to Reset
A good setup should be easy to clear out and start over.
After a trip, things build up fast. If it takes too much effort to clean or reorganize, it won’t get done.
In real use, simple setups win. Being able to remove items quickly and reset the space keeps the trunk usable day to day.
Common Trunk Storage Approaches
Open Storage (No Organization)
Open storage keeps the trunk fully flexible. You can load anything, anytime, without working around a setup.
The downside shows up in daily use. Without structure, items slide, tip over, and mix together. Small items get lost, and you end up moving things just to find what you need.
In real use, it works best when the trunk is mostly empty. Once you start carrying regular items, it becomes inefficient quickly.
That’s usually where interior clutter starts too, especially when smaller items move from the trunk into the cabin instead of having a dedicated place.
Bins and Containers
Bins add structure and make it easier to separate items.
They work well for keeping groceries, tools, or smaller gear in place instead of sliding around. Everything has a defined spot, which makes the trunk easier to manage day to day.
The tradeoff is space. Oversized bins can waste room and limit flexibility, especially when you need to carry larger items.
In real use, the benefit comes from sizing. Bins that fit the space and match what you carry make a noticeable difference.
Soft organizers add structure without locking you into a fixed setup.
They’re flexible and collapsible, so you can adjust or remove them easily depending on what you’re carrying. That makes them useful for everyday items that change often.
The tradeoff is support. They don’t hold their shape as well, so heavier items can shift or cause the organizer to sag.
In real use, they work best for lighter, frequently used items where flexibility matters more than rigidity.
These setups create a clean, stable layout that keeps everything in place.
They work well if you carry the same types of items regularly. Once installed, there’s less movement and less need to reorganize.
The tradeoff is flexibility. Fixed layouts can get in the way when you need to carry larger or different items.
In real use, they make sense for consistent routines, but can feel limiting when your needs change.
Approach
Best For
Organization Level
Flexibility
Ease of Use
Main Tradeoff
Open Storage
Occasional or light use
Low
Very High
Simple
Items slide and mix together
Bins and Containers
Daily items and mixed use
Medium
Medium
Easy once set up
Can waste space if not sized well
Soft Organizers
Light, changing items
Medium
High
Easy to adjust
Less support for heavier items
Built-In / Semi-Permanent
Consistent gear (tools, camping)
High
Low
Very stable
Limits flexibility for larger loads
Real-World Setup Styles (What Actually Works)
Simple Daily Setup (Most People)
For most people, simple works best.
Using one or two containers keeps everyday items contained while leaving the rest of the trunk open. That balance gives you structure without losing usable space.
In real use, this setup is easy to manage. Items stay in place, access is quick, and resetting the trunk takes minimal effort.
It’s not about maximizing storage. It’s about keeping things organized without getting in the way.
Hybrid Setup (Best Balance)
A hybrid setup combines structure with open space.
Using a couple of bins alongside open areas lets you keep smaller items contained while still having room for larger or changing loads. It creates dedicated zones without locking the trunk into one layout.
In real use, this gives you control without losing flexibility. Everyday items stay organized, and the rest of the space stays usable when your needs change.
Gear-Focused Setup
This setup is built around specific gear like camping, sports, or tools.
It uses more structure to keep items in place and easy to access. Everything has a defined spot, which works well when you carry the same equipment regularly.
The tradeoff is flexibility. More structure means less room to adjust when your load changes.
In real use, it works best when your trunk setup doesn’t change much.
Based on real use:
Simple setup → [Drive Auto Products Trunk Organizer]
More structure → [Rubbermaid ActionPacker Storage Box]
H2: Subaru Model Differences (Important for Setup)
Outback
The Outback has the longest cargo area, which makes it the easiest to organize.
The extra length gives you more layout options. You can separate items, create zones, or leave space open without everything feeling cramped.
In real use, this flexibility makes a big difference. It’s easier to keep items stable while still having room for larger or changing loads.
Forester
The Forester has more vertical space, which makes stacking easier.
You can load items higher without running out of room, which works well for bins or bulkier gear. The tradeoff is less length, so spreading items out isn’t as easy as in the Outback.
In real use, it favors vertical organization over long, spread-out layouts.
Crosstrek
The Crosstrek has a smaller cargo area, so space needs to be used more carefully.
There’s less room for loose items or oversized containers. Without tighter organization, things pile up quickly and become harder to access.
In real use, it rewards efficient layouts. Keeping items contained and avoiding wasted space makes a noticeable difference.
Layout Strategies That Actually Work
Side-to-Side Layout
This layout places bins along the sides and keeps the center open.
It works well because it controls smaller items without blocking the main cargo space. You still have room in the middle for larger items when needed.
In real use, it’s a simple way to add structure while keeping the trunk flexible and easy to load.
Back-to-Front Layout
This layout keeps frequently used items near the hatch and less-used items deeper in the trunk.
It works because it reduces how often you need to unload the trunk to reach something. Daily items stay within reach, while long-term gear stays out of the way.
In real use, it saves time and keeps the trunk functional without constant rearranging.
Zoned Layout
A zoned layout separates the trunk by use.
Create a daily items zone for things you grab often, a gear zone for bulkier or occasional items, and an emergency zone for items that need to stay accessible but out of the way.
In real use, this keeps everything predictable. You know where things are, and items don’t mix or get lost. It adds structure without locking the trunk into a fixed setup.
Common Mistakes That Make Trunks Worse
Overfilling the Space
Filling the trunk completely makes it harder to use.
With no room to move things, items get stacked and buried. You end up unloading multiple items just to reach one.
In real use, leaving some open space makes the setup more usable and easier to manage.
Keeping the rest of the interior easier to clean matters too, especially once dirt, wet gear, or daily mess starts spreading beyond the trunk area.
Using Containers That Don’t Fit Well
Containers that don’t match the trunk waste space.
Oversized bins create awkward gaps and limit how much you can actually carry. Undersized ones slide around and don’t hold items in place.
In real use, the fit matters more than the container itself. When it matches the space, everything stays more stable and the layout works better.
No Dedicated Zones
Without zones, everything ends up mixed together.
Daily items, gear, and emergency supplies all shift and overlap, which makes the trunk harder to use and slower to navigate.
In real use, even simple separation makes a difference. When items have a consistent place, they stay easier to find and manage.
Ignoring Height vs Length
How you use the space matters as much as how much you have.
Stacking uses height but makes access harder. Spreading items out uses length but keeps things easier to reach.
In real use, it depends on the vehicle. Taller spaces handle stacking better, while longer spaces work better with a flatter layout. Balancing both keeps the trunk usable without constant rearranging.
What Actually Works (Based on Real Use)
Keep One Area Always Clear
Leave part of the trunk open.
A clear area gives you space for unexpected items without having to rearrange everything. It keeps the setup flexible and easier to use.
In real use, this makes a big difference. You can add or remove items quickly without disrupting the rest of the layout.
This becomes even more important if you regularly travel with pets or larger gear that needs flexible cargo space.
Use Fewer Containers Than You Think
Too many containers make the trunk harder to use.
Over-organization leads to wasted space and more effort to access items. You end up moving bins around instead of quickly grabbing what you need.
In real use, fewer containers work better. Enough to keep things in place, but not so many that they limit the space.
Adjust Setup Based on Routine
Your setup should match how you use the trunk during the week.
Weekday use is usually lighter and more routine, while weekends often involve gear, trips, or larger loads. Keeping the same setup for both can get in the way.
In real use, small adjustments make it easier to manage. Shift or remove items as needed so the space works for what you’re doing.
Setup Tips Most People Miss
Small adjustments make a big difference in how the setup works.
Test before committing. Use it for a few days and see what actually gets used or gets in the way.
Check visibility. Avoid stacking items high enough to block your rear view.
Balance weight. Keep heavier items low and stable to prevent shifting.
Keep it easy to remove. If it’s hard to take out, it won’t stay flexible.
Revisit after a week. Real use will show what needs to change.
Most issues come from locking into a setup too early instead of adjusting based on use.
FAQs
What’s the best way to organize a Subaru trunk?
It depends on how you use it, but a hybrid setup usually works best. Some structure with open space.
Do trunk organizers actually help?
Yes, if they fit the space and match what you carry.
How do you keep items from sliding?
Placement and using the right containers. Stability matters more than adding more storage.
Should everything be in bins?
No. Leave some space open to keep the trunk flexible.
Is a permanent setup worth it?
Only if your use stays consistent. Otherwise, it can get limiting.
Final Thoughts
There’s no perfect setup, just what fits how you use your trunk.
More structure adds stability. More flexibility keeps the space usable. The right balance depends on what you carry.
Keep it simple. Stable, easy to access, and easy to adjust.
If you already know the type of setup you prefer:
Quick Recap
• Best rigid storage: Rubbermaid ActionPacker Storage Box (Amazon)
• Best soft organizer: Drive Auto Products Trunk Organizer (Amazon)
• Best cargo liner: Motor Trend FlexTough Cargo Liner (Amazon)
Flexible → [Drive Auto Products Trunk Organizer]
More stable → [Rubbermaid ActionPacker Storage Box]
It also helps to think about how the rest of the vehicle works with the trunk setup. Interior organization, floor protection, and dog setups all affect how usable the space feels day to day.
Disclosure: This article contains affiliate links. I may earn a commission at no extra cost to you.
Quick Picks: Best Floor Mats for a Subaru Outback
• Best overall / all-weather: WeatherTech FloorLiners (Amazon)
• Best heavy-duty: Husky Liners WeatherBeater (Amazon)
• Best budget-friendly: Motor Trend FlexTough Mats (Amazon)
Factory mats don’t hold up once you start using your Subaru daily. Dirt, water, and snow build up fast, and the areas that matter don’t stay protected for long.
Choosing better mats isn’t about brand. It comes down to fit, coverage, durability, and how easy they are to clean.
Fit also isn’t the same across models. Crosstrek, Forester, and Outback all have small differences that affect how mats sit and perform.
This guide focuses on real use. What actually works day to day, not overbuilt setups or unnecessary features.
What Actually Matters When Choosing Floor Mats
If you already know your use case, these match how most people use their Outback:
Daily driving → [WeatherTech FloorLiners]
Winter / heavy mess → [Husky Liners WeatherBeater]
“Custom fit” doesn’t always mean perfect fit in real use.
Fit can vary by model year and trim, and even small differences in floor shape or clip placement can leave gaps. Most mats technically fit, but may not fully cover edges near the sides or firewall, where dirt and water build up the most.
Sliding usually comes down to how well the mat sits against the floor. If it’s slightly undersized or too rigid to settle in, it can shift even with clips. Curling can also show up over time, especially if the mat never sat flat to begin with.
Material plays a role:
More rigid mats hold shape but can leave gaps
More flexible mats sit flatter but may move more
In practice, the goal isn’t a perfect outline. It’s a mat that stays in place, sits flat, and actually protects the areas that get used.
Coverage and Edge Height
Coverage is what actually protects your interior. Many mats cover the main foot area but leave gaps along the sides, near the door, or up by the firewall. That’s where dirt, salt, and water usually end up.
Edge height matters once conditions get messy. Low-profile mats handle light dirt, but anything involving snow, mud, or spills will run off the edges and onto the carpet. Higher-edge mats contain that mess, especially during winter or rainy days.
The real difference between mat types shows up here:
Basic all-weather mats cover the center but often leave edge gaps
Deeper, tray-style liners extend further and hold liquid better
In daily use, this comes down to how you drive. If you’re dealing with wet shoes, snow, or kids, edge height makes a noticeable difference. If not, standard coverage may be enough.
The goal is simple: protect the areas that actually get dirty, not just the center of the floor.
Material Types (Rubber vs TPE vs Carpet)
Material affects how the mat feels, holds up, and behaves over time more than most people expect.
Rubber mats are usually the most flexible. They’re easy to take in and out and handle mud and water well. The tradeoff is they can feel softer underfoot and may shift more if the fit isn’t tight. Some rubber mats also develop a noticeable smell, especially in heat.
TPE (thermoplastic) mats are more rigid and hold their shape better. This helps with edge coverage and keeping liquids contained. They tend to sit more securely and resist curling, but can feel stiffer and less forgiving when installing or removing. Smell is usually less of an issue compared to rubber.
Carpet mats are the most comfortable and quiet, but offer the least protection. They absorb water and dirt instead of containing it, which makes them harder to clean and less ideal for messy conditions.
In real use:
Rubber = flexible and easy, but less structured
TPE = more stable and protective, but stiffer
Carpet = comfortable, but limited protection
The choice comes down to how much mess you deal with. Daily clean use can get by with carpet, but anything involving water, mud, or snow benefits from a more structured material.
Daily Use Factors
Daily use is where differences show up. Most mats look similar at first, but how they behave over time matters more.
Ease of removal and cleaning
Flexible mats are easier to pull out, shake off, and rinse. Rigid mats hold their shape better but can be more awkward to remove, especially in tighter footwells. If you’re cleaning often, this becomes noticeable.
Grip underfoot
Grip depends on both the surface texture and how well the mat fits. Mats that sit flat and lock into place feel stable. If the fit is off or the material is too slick, you’ll feel movement when getting in or adjusting your foot.
Noise and feel while driving
Carpet is the quietest and most natural underfoot. Rubber can feel softer but slightly less planted. More rigid mats can feel firmer and may produce a subtle hollow or plastic feel, especially on longer drives.
In real use:
Easier removal = more consistent cleaning
Better fit = better grip
Material = changes how the mat feels day to day
The right choice depends on how often you clean and how much you notice small differences while driving.
The rest of the interior setup matters too, especially how you handle daily clutter and storage.
Types of Floor Mats for Subaru Outback
All-Weather Mats (Most Common Choice)
All-weather mats are the most practical option for everyday driving. They handle dirt, water, and light seasonal mess without feeling bulky or overbuilt.
They’re typically made from rubber or TPE with channels that trap debris and moisture, keeping it off the carpet.
Where they work best:
daily driving and mixed use
light rain, dirt, and occasional snow
The main difference is flexibility vs structure:
softer mats are easier to remove and clean but may shift more
more rigid mats stay in place better and contain liquid more effectively
The tradeoff is coverage. Compared to deeper liners, they don’t extend as far up the sides, so they’re less effective in heavy snow or mud.
For most people, they strike the right balance:
good protection, easy to live with, and simple to maintain.
For most people, this is where all-weather mats make the most sense → [WeatherTech FloorLiners]
Heavy-Duty Liners
Heavy-duty liners are built for messy conditions. The key difference is higher edges and a more structured shape, which keeps water, mud, and debris contained instead of spreading onto the carpet.
In real use, this matters most in winter, rainy conditions, or with dogs. Snow melt and dirt stay inside the liner rather than leaking over the sides.
Compared to standard all-weather mats:
basic mats handle light dirt but can overflow
heavy-duty liners extend further and hold more liquid
The tradeoff is usability. They’re more rigid, slightly harder to remove, and more noticeable underfoot.
If you regularly deal with snow, mud, or pets, the added coverage is worth it.
If you deal with snow, mud, or pets regularly, deeper liners are a better fit → [Husky Liners WeatherBeater]
Carpet Mats
Carpet mats look the best and feel the most natural underfoot. They match the interior and keep the cabin quieter.
The downside is protection. They absorb water, dirt, and salt instead of containing it, which makes them harder to clean and more prone to staining over time.
They work fine for dry, everyday driving. In rain, snow, or heavier use, they wear out quickly.
If appearance matters most, they’re a good fit. If you deal with mess regularly, they’re limited.
Type
Best For
Protection Level
Coverage
Daily Use Feel
Main Tradeoff
All-Weather Mats
Everyday driving
Medium
Moderate
Comfortable, flexible
Less coverage in heavy mess
Heavy-Duty Liners
Snow, mud, pets
High
Full (with edges)
Firm, more structured
Harder to remove/clean
Carpet Mats
Clean, dry conditions
Low
Basic
Soft, quiet
Absorbs water and stains
Based on real use:
Everyday use → [WeatherTech FloorLiners]
Snow / mud → [Husky Liners WeatherBeater]
Real-World Fit on Subaru Outback
Driver Footwell Fit Issues
The driver side is where fit matters most. Small issues show up quickly in daily use.
Dead pedal coverage is often limited. Some mats don’t extend far enough left, leaving that area exposed to dirt and salt.
Pedal clearance is critical. A mat that doesn’t sit flat or shifts can interfere with pedal movement.
Edge gaps are where protection breaks down. Even “custom fit” mats can leave small spaces along the sides or near the firewall, letting debris get underneath.
In real use, the difference comes down to coverage and stability. Mats that extend further and stay in place do a better job protecting the areas that see the most wear.
Passenger Side Fit
The passenger side is simpler, but fit still matters.
Most mats sit flat at first, but shifting can show up over time. Without strong anchor points, lighter or more flexible mats tend to slide forward or bunch slightly.
Coverage can also be limited near the edges, especially along the door side and front, where dirt and water can get around the mat.
In real use, the difference is stability. Mats that hold their shape stay in place better, while softer ones are more likely to move.
Rear Seat Coverage
Rear coverage is where differences show up quickly, especially with passengers, kids, or pets.
The main choice is one-piece vs two-piece. One-piece mats cover the full width and the center hump, which keeps dirt and spills contained. Two-piece mats are easier to handle but usually leave the center exposed.
Center hump coverage matters more than it seems. It gets stepped on and collects dirt, but many mats don’t cover it well.
In real use, one-piece designs offer better protection, while two-piece designs are simpler but leave gaps.
Floor Mats Across Subaru Models (Outback vs Crosstrek vs Forester)
Outback (Longest Floor, Best Coverage Potential)
The Outback has the most usable floor space, which makes fitment more forgiving.
Most mats sit flat and align well because there’s more room to work with. That usually means fewer gaps and more consistent edge coverage, especially compared to smaller models.
The longer floor also helps with rear coverage. One-piece designs fit more naturally and cover the center area better without feeling cramped.
In real use, this translates to:
easier installation
better overall coverage
fewer fit issues
As long as the mat is designed for the correct model year, the Outback is the easiest Subaru to get right.
Crosstrek (Tighter Fit, More Gaps)
The Crosstrek has a smaller footwell, which makes fitment more sensitive.
There’s less room for adjustment, so small differences in shape or size show up quickly. Mats that aren’t well-matched can leave edge gaps or sit slightly off, especially near the sides and firewall.
Because of the tighter space, mats also have less tolerance for movement. If the fit isn’t precise, shifting is more noticeable than in larger models.
In real use, this means:
fit needs to be more exact
gaps are more likely with generic designs
stability depends heavily on how well the mat matches the floor
On the Crosstrek, good fit matters more than anything else.
Forester (Taller Cabin, Different Feel)
The Forester’s taller cabin changes how mats feel in daily use.
There’s more vertical space, so getting in and out is more upright. That puts more direct pressure on the mats, especially on the driver side, which makes stability and grip more noticeable.
Because of the height, the mat can feel slightly more “separate” from the floor compared to the Outback. Softer mats may feel less planted, while more structured mats tend to feel more secure.
Coverage is usually straightforward, but how the mat sits matters more than how much it covers.
In real use, the difference comes down to feel:
more upright entry = more pressure on the mat
better structure = more stable underfoot
It’s less about fit challenges and more about how solid the mat feels day to day.
Common Problems People Run Into
Mats That Slide or Don’t Stay in Place
Sliding usually comes down to fit and how the mat is secured.
Clip compatibility is a common issue. If the mat doesn’t align with the factory retention points or isn’t clipped in, it will shift over time.
Backing material also plays a role. Mats with more grip stay put better, while smoother or more flexible mats are easier to remove but more likely to move.
In real use, a mat that doesn’t lock in and sit flat will shift. Fit and proper anchoring matter most.
Edges That Curl Over Time
Curling usually shows up at the edges after a few months.
Temperature changes are the main cause. Heat can soften the material and let edges lift, while cold makes them stiff and less likely to settle back down.
Material matters. More structured mats hold their shape better, while softer ones are more prone to curling.
Once edges lift, the mat won’t sit flat and debris can get underneath. Mats that hold their shape from the start tend to last longer.
Not Enough Coverage in Winter
Winter is where coverage issues show up quickly.
Snow melt can run off low-edge mats and onto the carpet, especially with repeated use. Once water gets past the mat, salt builds up and can stain or damage the interior over time.
In real use, this comes down to edge height and coverage. Mats that extend further and hold liquid prevent most of it, while flatter mats let it spread.
Cheap Mats That Feel Fine at First
Cheap mats often seem fine at first, but issues show up over time.
They wear faster and lose shape, which leads to curling, shifting, and reduced coverage. Once they stop sitting flat, protection drops off quickly.
In real use, the difference is durability. Mats that hold their shape last longer and stay in place.
What Actually Works (Based on Real Use)
For Daily Driving
For everyday use, balanced mats work best. They handle dirt and light moisture without feeling bulky.
The key is easy cleaning. Mats that are simple to remove and rinse get cleaned more often, which keeps the interior in better shape.
Comfort also matters. Slightly flexible mats feel more natural underfoot for daily driving.
In real use, it comes down to convenience. Enough protection, easy to maintain, and comfortable day to day.
For Winter / Snow / Mud
In heavy conditions, coverage matters most.
You need higher edges and full floor protection to keep water, slush, and dirt contained. Snow melt builds up quickly, and lower-profile mats let it spill onto the carpet.
In real use, deeper, more structured mats make the difference. They contain the mess instead of letting it spread.
For Families / Kids / Pets
For this use, the rear matters most.
Rear coverage handles most of the mess. Kids and pets bring dirt and constant traffic, so gaps in the back seat area show up quickly. Full-width coverage helps keep it contained.
Spill resistance also matters. Drinks, wet shoes, and muddy paws need to stay on the mat, not soak into the carpet.
In real use, it’s about containment and easy cleanup.
If you regularly travel with pets, it also helps to think about how the rest of the interior is protected and where the dog rides during longer trips.
Setup Tips Most People Miss
Small setup steps make a big difference in how mats perform.
Install clips properly. If the mat isn’t anchored, it will shift no matter how good the fit is.
Let mats settle before judging fit. New mats can take a day or two to lay flat, especially after being packaged.
Clean before first install. A quick wipe reduces slip and helps the mat sit flush.
Check pedal clearance after install. Make sure nothing interferes with movement.
Remove and clean regularly. Built-up dirt can cause mats to warp or lose shape over time.
In real use, most issues come from setup, not the mat itself.
FAQs
Are aftermarket floor mats better than Subaru OEM mats?
It depends on coverage and use. Aftermarket mats usually offer more protection, while OEM mats are simpler and fit more predictably.
Do floor mats affect driving safety?
Only if they don’t fit properly or aren’t secured. Loose or stacked mats can interfere with pedals.
Which material is best for winter?
TPE or rubber with higher edges. They contain water and slush instead of letting it spread.
Do all floor mats fit every Outback year?
No. Fitment varies by model year and trim, so it’s important to match them correctly.
Are one-piece rear mats worth it?
Usually. They provide better coverage, especially over the center area where dirt builds up.
Final thoughts
There’s no perfect floor mat, just the one that fits how you use your Subaru.
More protection usually means more structure. Easier daily use usually means less coverage. The right choice depends on your conditions and routine.
Fit, coverage, and how well the mat holds up matter most. If it stays in place and protects the areas that get used, it’s doing its job.
If you already know the type of setup you need:
Quick Recap
• Best overall / all-weather: WeatherTech FloorLiners (Amazon)
• Best heavy-duty: Husky Liners WeatherBeater (Amazon)
• Best budget-friendly: Motor Trend FlexTough Mats (Amazon)
Daily use → [WeatherTech FloorLiners]
Heavy conditions → [Husky Liners WeatherBeater]
Interior protection, storage, and daily usability all work together over time.
Disclosure: This article contains affiliate links. I may earn a commission at no extra cost to you.
Most roof box reviews focus on specs, not real use.
This guide looks at how this size works on Crosstrek, Forester, and Outback setups. Fit, placement, and daily usability all change depending on the vehicle.
The goal is simple. Show how it performs for road trips, camping, and winter travel.
If you want to know how this size actually works day to day, this will give you a clear answer.
Quick pick:
• SkyBox 16 → best balance for most setups • SkyBox 18 → better for bulkier gear • SkyBox 21 → maximum storage for family trips
Overview: Where the SkyBox 16 Fits in Yakima’s Cargo Box Lineup
What the SkyBox series is designed for
The SkyBox series is built for simple, everyday storage. It adds space for road trips, weekend travel, and outdoor gear without complicating setup.
The focus is ease of use. It works well with luggage, duffels, and general gear, and installs without much adjustment.
Compared to more premium options, the differences are mostly in finish, not function.
In real use, it is a straightforward, no-fuss option for everyday travel.
Why the 16-cubic-foot size is a common choice
The 16-cubic-foot size balances storage with everyday drivability.
It adds enough space for luggage, camping gear, or winter equipment without pushing height or wind impact too far. On most vehicles, it stays manageable in daily use.
At around 47 pounds, it is reasonable to install with two people. The added length gives more capacity but makes placement and hatch clearance more important.
In real use, it offers extra space without becoming difficult to live with.
Typical uses for this cargo box
This size works best when you need extra space for full trips, not just overflow.
It is well suited for family road trips, moving luggage out of the cabin to free up space. It also works well for camping, keeping bulky or dirty gear separate.
For winter travel, it handles skis, snowboards, and cold-weather gear while keeping everything protected.
In real use, it helps clear interior space and makes packing easier.
Key Specifications and Dimensions
Explain the measurements that affect fit and usability
Capacity is about 16 cubic feet, enough for luggage, camping gear, or winter equipment.
The added length increases usable space but makes placement and hatch clearance more important, especially on shorter roofs.
At around 47 pounds, it is manageable with two people. The challenge is positioning, not weight.
It fits crossbar spreads of roughly 24 to 36 inches, working with most factory and aftermarket setups.
It supports skis up to about 185 cm, covering most standard use.
In real use, it offers good capacity with moderate placement sensitivity.
Key specifications at a glance
For a quick check, these are the measurements that matter most when deciding if the SkyBox 16 fits your vehicle and gear.
Specification
SkyBox 16
Capacity
~16 cu ft
Weight
~47 lb
Exterior dimensions
~81” L x 36” W x 15” H
Crossbar spread
~24”–36”
Max ski length
~185 cm
This size offers solid capacity, but the longer length makes placement and hatch clearance more important than smaller boxes.
Fitment on Subaru Vehicles
Crosstrek fit considerations
The Crosstrek’s shorter roof makes placement more sensitive with this size.
To maintain hatch clearance, the box needs to sit further forward, which depends on crossbar adjustment. Limited adjustment can push it too far back.
Because of the length, balance matters more. Centering it between the bars helps stability.
In real use, it fits, but placement is less forgiving than on larger Subarus.
Forester fit considerations
Fitment is straightforward, but the taller roof changes daily use.
Loading is less convenient, often requiring a small step to reach the center. Wind noise is also more noticeable with the box sitting higher.
In real use, fit is easy, but height and access are the main tradeoffs.
Outback fit considerations
The longer roof makes this size easier to position.
There is more room to move it forward, which helps maintain hatch clearance. Placement is more forgiving than on shorter roofs.
In real use, it fits comfortably with fewer issues.
Crossbar compatibility
This box works with both factory and aftermarket crossbars, but adjustment affects placement.
Factory bars usually fit but limit forward positioning, making hatch clearance more sensitive.
Aftermarket bars allow more flexibility, making it easier to center the box and maintain clearance.
In real use, more adjustability makes setup easier.
If you are working with limited adjustment, switching to aftermarket crossbars makes placement much easier:
• Thule WingBar Evo → more adjustability and easier positioning •Yakima JetStream → similar performance with a different mounting style
Storage Capacity and Real-World Packing
What actually fits inside
This box works best with soft, flexible gear.
It fits duffel bags, sleeping bags, and camping gear easily. In winter, it handles jackets, snow gear, and skis without issue.
Soft items pack more efficiently than rigid bins.
In real use, it handles typical travel gear without feeling cramped.
Interior shape and usable space
Usable space depends more on shape than volume.
The interior tapers at the ends, so most space is in the center. This works well for soft gear but limits bulky items.
In real use, shape matters more than size when packing.
Gear types that work best in this size box
This size works best with soft, flexible gear.
It handles luggage, road trip gear, and seasonal equipment easily.
Rigid items are harder to fit.
In real use, it works best for mixed gear that can be adjusted as you pack.
Installation and Mounting Experience
How Yakima’s mounting clamps work
The system uses clamps that tighten around the crossbars from inside the box.
You position the box, adjust the clamps, and tighten to secure it. No tools needed.
In real use, it is quick to install and easy to adjust.
Installation time and effort
Installation takes about 10 to 20 minutes.
Two people make lifting easier. One person can manage it, but it is less convenient.
In real use, most effort is getting the box onto the roof.
Removing and storing the box
At around 47 pounds, the weight is manageable, but the size makes handling harder.
Two people make removal easier. One person can do it, but it is less convenient.
Storage requires enough wall or ceiling space.
In real use, size matters more than weight.
Everyday Usability
Dual-side opening access
It opens from either side, which helps in tight parking.
You can load from the safer or more accessible side.
In real use, it makes loading more flexible.
Locking and security features
The lid locks at multiple points with a central system.
It only locks when fully closed, preventing partial closure.
In real use, it is simple and reliable.
Loading height on taller vehicles
On taller vehicles like the Forester, loading is less convenient.
Reaching the center often requires a small step.
In real use, height affects usability more than fit.
Noise, MPG Impact, and Driving Comfort
Wind noise at highway speeds
Wind noise depends on how the box affects airflow.
• SkyBox 12 → easier fit on smaller roofs • SkyBox 16→ best balance for most setups • SkyBox 18 → better for bulkier gear • SkyBox 21 → maximum storage for family trips
Pros and Limitations of the SkyBox 16
Where the SkyBox 16 performs well
The SkyBox 16 stands out for its balance of size, usability, and compatibility.
It offers enough space for luggage, camping gear, and mixed loads without becoming difficult to position or live with. Its mid-size footprint fits most vehicles without pushing height or clearance limits.
It works with both factory and aftermarket crossbars, making setup straightforward across different vehicles.
In real use, it handles everyday trips well while staying easy to install, position, and use regularly.
Situations where a larger box might be better
A larger box makes sense if you regularly need more space.
Useful for family trips, bulky camping gear, or multiple sets of winter gear.
Tradeoffs are more height and more sensitive placement.
Choose it if you consistently need the extra capacity.
Situations where a smaller box might make more sense
A smaller box is better when fit and clearance matter most.
It is easier to position on shorter roofs and helps with garage clearance.
Choose it for lighter gear and simpler setups.
Who This Cargo Box Is Best For
Subaru owners who want balanced storage capacity
The SkyBox 16 fits Subaru owners who want extra space without added complexity.
It handles luggage and weekend gear while staying manageable in size.
In real use, it adds storage without making the vehicle harder to live with.
Families who need extra luggage space
The SkyBox 16 is a good fit for family road trips.
It moves luggage out of the cabin, improving space and comfort.
In real use, it adds capacity without making the setup harder to manage.
Drivers who regularly carry outdoor gear
The SkyBox 16 works well for seasonal gear.
It keeps camping and winter gear out of the cabin.
In real use, it adds flexible storage without changing setups.
FAQs
Does the Yakima SkyBox 16 fit a Subaru Crosstrek?
Yes, but fit is tighter.
Forward placement matters for hatch clearance, and crossbar adjustment is more limited.
Will the SkyBox 16 block the rear hatch on an Outback?
Usually no.
The longer roof allows forward placement, so most setups keep full hatch clearance.
How much gear fits inside the SkyBox 16?
About 16 cu ft.
Enough for luggage, camping gear, or skis for 2–3 people.
Is the SkyBox 16 easy to install alone?
Manageable, but easier with two people.
Most effort is lifting it onto the roof.
Does the SkyBox 16 create wind noise on the highway?
Yes, some.
The shape helps reduce it, but it is still noticeable at speed.
Can the SkyBox 16 stay mounted year-round?
Yes.
Expect some added noise and a small drop in MPG.
Final Thoughts
The SkyBox 16 is a practical middle ground. It adds space without pushing fitment or daily usability too far.
There is no perfect setup. More space adds height and placement sensitivity. Smaller boxes are easier to manage but limit capacity.
Choose based on how you use your vehicle and the gear you carry most.
From here, the next step is dialing in size, crossbars, and fit for your specific setup.
If you’re comparing options or building your setup, these guides will help:
Disclosure: This article contains affiliate links. I may earn a commission at no extra cost to you.
Most Subaru owners look into a cargo box when interior space runs out. Road trips, camping gear, and winter travel add up quickly on a Crosstrek, Forester, or Outback.
How it feels in use depends on the vehicle. Roof height, crossbar spacing, and hatch clearance all affect fit, noise, and usability.
This review focuses on real-world use once the box is installed and loaded, not ideal setups.
The goal is simple. Understand how it fits, how it packs, and how it feels day to day.
Overview: What the Thule Motion XT M Is Designed For
Where the Motion XT M fits in Thule’s cargo box lineup
The Motion XT M sits in the middle of Thule’s lineup. It is positioned above entry-level options like the Force series and below premium models like the Vector.
Compared to entry-level boxes, it is more aerodynamic, quieter at speed, and easier to use day to day. Compared to premium models, the main differences are in materials and finish, not core function.
For most buyers, it is the practical middle ground with better usability than budget options without paying for premium styling.
Why this size is popular with Subaru owners
This size works well on Subarus because it balances storage with everyday usability.
It adds enough space for travel bags, camping gear, or skis without pushing height too far or complicating fitment. On models like the Forester, Outback, and Crosstrek, it usually fits within the usable roof length while maintaining hatch clearance.
Larger boxes add capacity but are more noticeable. Smaller boxes are easier to live with but can feel limiting.
For most Subaru owners, this size is the practical middle ground.
Typical uses for a mid-size cargo box
A mid-size cargo box works best when you need extra space without going oversized.
It is well suited for road trips and luggage overflow, freeing up room inside the vehicle. It also works well for camping, keeping bulky or dirty gear out of the cabin.
In winter, it helps keep bags and gear dry and protected from snow and road spray.
For most trips, it adds useful space without the added height and tradeoffs of larger boxes.
The Motion XT M offers about 400 liters of space, enough for travel bags, camping gear, or a few pairs of skis without going oversized.
Its exterior size fits well on most Subarus while still allowing proper placement for hatch clearance. Inside, usable space is centered due to taper at the ends.
At around 38–40 lb, it is manageable to install with two people. Load capacity still depends on your vehicle’s roof rating, so packing light and centered matters.
The PowerClick system makes mounting quick, and the SlideLock ensures the box is fully closed before locking.
Overall, the specs translate to a setup that is easy to mount, fits well, and handles typical travel gear.
Key specifications at a glance
For a quick check, these are the specs that matter most when deciding if the Motion XT M fits your vehicle and gear.
Specification
Motion XT M
Capacity
~400 liters (14 cu ft)
Weight
~38–40 lb (17.5 kg)
Exterior dimensions
~69” L x 36” W x 17” H
Internal dimensions
Tapered, widest at center
Max ski length
~155–175 cm (depending on fit)
Load capacity
Up to ~165 lb (vehicle limit applies)
Mounting system
PowerClick quick-mount
Locking system
SlideLock (auto-lock when closed)
This size works well for most Subaru setups, offering enough capacity for typical trips while staying manageable in height and fitment.
How the Motion XT M Fits on Subaru Vehicles
Crosstrek fit considerations
The Crosstrek’s shorter roof limits how far the Motion XT M can be positioned.
To maintain hatch clearance, the box usually needs to sit further forward, which depends on crossbar spacing and mounting adjustment. With limited adjustment, it can end up too far back.
Because of the shorter roof, balance matters more. Keeping the box centered between the crossbars helps with stability.
It can fit well on a Crosstrek, but placement is less forgiving than on larger Subarus.
Forester fit considerations
The Forester’s taller roof changes how the Motion XT M feels in daily use.
With the box sitting higher, wind noise is more noticeable at highway speeds. Height also makes loading less convenient, often requiring a small step to reach the center.
Fitment is generally straightforward, but overall height and access are the main tradeoffs.
Outback fit considerations
The Outback’s longer roof makes the Motion XT M easier to position.
There is more room to move the box forward, which helps maintain hatch clearance while keeping it balanced. Placement is generally more forgiving than on smaller Subarus.
Hatch clearance should still be checked, but most setups allow full opening when positioned correctly.
In real use, the Motion XT M fits comfortably on an Outback with fewer limitations.
Crossbar compatibility
The Motion XT M works with both factory and aftermarket crossbars, but adjustability affects placement.
Factory bars usually fit but can limit forward positioning, making hatch clearance more sensitive.
Aftermarket bars allow more spacing flexibility, making it easier to center the box and maintain clearance.
More adjustment range generally makes the setup easier to get right.
If you’re working with limited adjustment on factory bars, switching to aftermarket crossbars makes placement much easier.
Yakima JetStream→ similar performance with a different mounting style
Storage Capacity and Real-World Packing
What actually fits inside
The Motion XT M works best with soft, flexible gear.
It easily holds duffel bags, jackets, and standard luggage, with room for smaller items. Camping gear like sleeping bags and tents also fit well when packed in soft bags.
Because the interior tapers, bulky items like hard bins or large coolers are harder to fit. The most usable space is in the center.
In real use, it handles typical travel and outdoor gear without feeling cramped.
This box works best when you pack with soft gear instead of rigid containers.
The Motion XT M opens from both sides, which makes daily use easier.
You can load from either side, which helps in tight parking or when one side is blocked.
In real use, it simplifies loading and unloading.
Locking and closing system
The Motion XT M uses Thule’s SlideLock system to manage both closing and locking.
The lid only locks when it is fully closed, which helps prevent partial closure. You get a clear confirmation before removing the key.
In real use, it reduces guesswork and makes it easier to secure the box properly.
Loading height on taller vehicles
On taller SUVs like the Forester, loading height is more noticeable.
Reaching the center often requires a small step, especially for frequent use.
In real use, height affects usability more than fit.
Noise, MPG Impact, and Driving Comfort
Highway wind noise
Wind noise is one of the first changes you notice with a cargo box.
Shape matters most. Lower-profile, tapered boxes are quieter, while taller or more squared designs are more noticeable.
In real use, aerodynamic shapes are easier to live with on longer drives.
Fuel economy changes
A cargo box usually lowers fuel economy, mainly at highway speeds.
Lower-profile boxes reduce the impact, while taller boxes create more drag.
In real use, the drop is modest and returns to normal when the box is removed.
Stability and crosswind behavior
A cargo box adds surface area, making the vehicle more sensitive to crosswinds.
At highway speeds, you may notice slight movement, especially with taller boxes. Lower-profile designs feel more stable.
In real use, the effect is manageable but more noticeable in wind.
Motion XT M vs Other Motion XT Sizes
Motion XT M vs Motion XT L
The main difference is length and capacity.
The L offers more space for bulky gear and longer items, while the M is easier to position, especially on shorter roofs.
The added length of the L makes hatch clearance and placement more sensitive. The M is easier to center and live with day to day.
In real use, choose the L for maximum space, and the M for easier fit and usability.
Motion XT M vs Motion XT XL
The main difference is size and capacity.
The XL offers more space for family trips and bulky gear. The M is easier to position with fewer clearance concerns.
The XL adds more height and is more sensitive to placement.
In real use, choose the XL for maximum space and the M for easier day-to-day use.
Motion XT M vs Force 3 L Sport
The main difference is shape.
The Alpine is longer and narrower, built for skis and other long gear. The M is shorter and wider, making it easier to pack luggage and mixed gear.
The longer Alpine shape is also more sensitive to placement and hatch clearance.
In real use, choose the Alpine for long gear and the M for general travel.
Motion XT size comparison at a glance
This quick comparison shows how each size differs in real use.
Model
Capacity
Box Length
Ideal Use Case
Vehicle Fit
Motion XT M
~14 cu ft
Mid-length
Everyday trips, mixed gear, easy fit
Works well on most Subarus
Motion XT L
~16 cu ft
Longer
Bulkier gear, longer items
Better on Forester, Outback
Motion XT XL
~18–22 cu ft
Longest
Family travel, max storage
Best on larger roofs (Forester, Outback)
Thule Force 3 L Sport
~16 cu ft
Long and narrow
Skis and long gear
Works best with careful placement
In real use, the M is the easiest to fit and live with, while the L and XL add space with more placement sensitivity. The Alpine is best for long gear rather than general storage.
The Motion XT M stands out for its balance of size, fit, and usability.
It offers useful storage without adding unnecessary height or fitment issues. The aerodynamic shape helps reduce wind noise, and the mounting system makes positioning straightforward.
In real use, it is easy to install, easy to live with, and fits well on most vehicles.
Situations where a larger box might be better
A larger box makes sense when you regularly need more space.
This includes family trips, bulky gear, or longer skis and multiple sets of winter equipment.
The tradeoff is added height, more noise, and more sensitive placement.
In real use, choose a larger box if you consistently need the extra capacity.
Situations where a smaller box might make more sense
A smaller box makes sense when fit and clearance are the priority.
It is easier to position on shorter roofs and helps maintain hatch clearance. It also reduces height for garages and low-clearance areas.
In real use, it works best for lighter storage needs and simpler setups.
Who This Cargo Box Is Best For
Subaru owners who want balanced storage
The Motion XT M is a good fit for Subaru owners who want extra space without added complexity.
It handles everyday travel like luggage and weekend gear while staying manageable in height and fit.
In real use, it adds storage without making the vehicle harder to live with.
Families who need extra luggage space
The Motion XT M works well for families who need more room on road trips.
It moves luggage out of the cabin, improving space and comfort without adding excessive height.
In real use, it adds enough capacity for multi-day trips while staying manageable.
Drivers who leave the cargo box installed frequently
The Motion XT M works well for drivers who keep a cargo box on most of the time.
Its aerodynamic shape helps reduce wind noise and drag, making daily driving more comfortable.
In real use, it adds storage without making the vehicle feel cumbersome.
FAQs
Does the Motion XT M fit a Subaru Crosstrek?
Yes. Fit is tighter due to the shorter roof, so forward positioning is important for hatch clearance.
Will the Motion XT M block the rear hatch on an Outback?
Usually no. The longer roof allows forward placement, which keeps the hatch clear.
How much gear fits inside the Motion XT M?
About 14 cu ft. Enough for duffels, luggage, and camping gear. Works best with soft items.
Is the Motion XT M difficult to install alone?
Not difficult, but easier with two people. The main challenge is lifting it onto the roof.
Does the Motion XT M create wind noise on the highway?
Some. It is quieter than boxier designs, but still noticeable at speed.
Can the Motion XT M stay on the roof full time?
Yes. Expect some added noise and a small drop in fuel economy.
Final Thoughts
The Motion XT M works because it stays balanced. It adds useful space without pushing height, fitment, or daily usability too far.
There is no perfect setup. Larger boxes add capacity but bring more tradeoffs. Smaller boxes are easier to live with but more limiting.
The right choice depends on how you use your vehicle. Mixed travel and everyday use favor this size. More gear or more constraints may push you larger or smaller.
From here, it comes down to your vehicle, your gear, and your trips. That is where more specific comparisons and setup guides help.
If you’re comparing options, it helps to look at size and fit side by side.
_China_(9).jpg)