Author: Kalford215

  • Thule vs Yakima Cargo Boxes for Subaru

    Choosing a roof cargo box for a Subaru seems simple at first. Most boxes list similar capacities, and compatibility charts say they should fit. In real use, though, small details make a big difference.

    Subaru roofs have a few quirks. Hatch swing, crossbar spacing, and roof length can turn a “compatible” box into something frustrating if it sits too far back, blocks the hatch, or creates more wind noise than expected.

    This guide focuses on how cargo boxes behave in everyday Subaru use road trips, weekend gear hauling, and normal daily driving. It’s written for Crosstrek, Forester, and Outback owners who want a setup that works well without constant adjustments.

    The goal is simple: help you choose a cargo box that fits properly, stays quiet on the highway, and remains easy to live with over time.

    Disclosure: This article contains affiliate links. I may earn a commission at no extra cost to you.

    Silver Subaru Forester with a roof cargo box, rear three-quarter view
    Photo: Dinkun Chen, CC BY-SA 4.0, via Wikimedia Commons

    Quick Picks for Subaru Owners

    If you just want the short answer, these cargo boxes consistently work well on Crosstrek, Forester, and Outback roofs.

    Best overall for most Subaru owners

    Thule Motion XT M (Amazon)

    Balanced size, excellent hatch clearance flexibility, and easy everyday usability.

    Best for quiet highway driving

    Thule Vector M

    Low-profile design that reduces wind noise and drag.

    Best value option

    Yakima SkyBox 16 Carbonite (Amazon)

    Reliable, roomy, and usually priced lower than comparable premium models.

    Best low-profile box for fuel economy

    Thule Motion XT Low (Amazon)

    Lower height helps reduce wind drag and highway noise.

    The Subaru Reality Check Before You Compare Brands

    Before comparing brands, it helps to understand a few Subaru-specific fit factors that influence how well a cargo box actually works in daily use.

    Hatch clearance is the dealbreaker (especially on Outback)

    A cargo box can mount securely and still be a poor fit if it blocks the rear hatch. When the hatch can’t open fully, everyday access quickly becomes frustrating.

    The Outback is especially sensitive because the hatch swings upward and slightly forward. Even a properly mounted box can contact the hatch if it sits too far rearward.

    Placement matters more than overall box length. If the box extends behind the rear crossbar, interference becomes more likely.

    Before committing, open the hatch fully with the box installed and confirm comfortable access.

    If clearance is tight, you need more forward placement flexibility or a different box shape. On the Outback, this often determines whether the setup remains usable long term.

    Crossbar type and spacing changes what “fits”

    Compatibility does not guarantee a good fit. Crossbar design and spacing determine where a box can sit once mounted.

    Cargo boxes clamp to the bars. If spacing is limited, the box may be forced rearward, increasing hatch interference and reducing balance.

    Fixed factory bars limit adjustment. Adjustable crossbars allow wider spread and forward positioning, which often improves real-world fit.

    Bar height and profile can also affect clamp clearance and mounting compatibility.

    Focus on placement flexibility rather than compatibility alone. A box that mounts but can’t be positioned correctly can create daily frustration.

    What matters more than stated volume (shape, usable packing, mounting range)

    Listed volume rarely reflects real usability. Shape, interior layout, and mounting flexibility determine how useful a box actually is.

    Tapered noses and rounded rears often pack more efficiently and can improve hatch clearance compared with square designs.

    Smooth interiors and wide openings improve usable space and loading ease.

    Mounting range matters as well. Limited clamp travel can force the box rearward, while longer tracks allow better forward positioning.

    Choose based on how the box packs, mounts, and fits your roof. Stated volume is best treated as a rough comparison.

    Thule vs Yakima — How They Compare in Real Use

    Once the basic fit factors are understood, the next step is looking at how the two brands compare during everyday use.

    Fitment & Hatch Clearance on Subaru Roofs

    Best buy for Subaru hatch clearance:

    Thule Motion XT M (Amazon)

    Honorable mention:

    Yakima SkyBox 16 Carbonite (Amazon)

    Both offer strong real-world usability, but models with longer mounting adjustment make forward positioning easier when hatch clearance is tight.

    Hatch clearance often determines whether a roof box setup works smoothly in daily life. A carrier can mount securely and still become frustrating if the rear hatch can’t open fully.

    The key factor isn’t box length. It’s how far forward the box can be positioned while still clamping securely. Forward placement keeps the rear of the box clear of the hatch as it swings upward.

    Both Thule and Yakima use sliding clamp systems that allow some fore-aft adjustment. The usable mounting range determines how flexible that positioning is. A longer box with generous mounting travel can sometimes clear the hatch more easily than a shorter box with limited adjustment.

    Many Thule models provide slightly longer mounting tracks, which can make forward positioning easier when clearance is tight. Yakima mounting systems are simple and secure, though some models offer slightly less adjustment range.

    Subaru models also vary in sensitivity. The Outback is the most demanding because the hatch swings upward and slightly forward. The Forester usually has manageable clearance, while the Crosstrek is generally the least sensitive.

    Noise and Highway Comfort

    Best buy for highway comfort:

    Thule Vector M

    Honorable mention:

    Yakima GrandTour 16

    Both use aerodynamic shells that reduce turbulence compared with taller cargo boxes, helping wind noise blend into normal highway road sound.

    Roof boxes rarely sound identical on the highway, but the differences usually come from shape and placement rather than brand.

    Lower, tapered boxes disturb airflow less than tall or blunt designs. Mounting the box farther forward can also help because airflow coming off the windshield is smoother there. Crossbar design matters too—aerodynamic bars are noticeably quieter than square ones.

    Between comparable shapes, Thule and Yakima perform similarly. Low-profile boxes are typically the quietest, mid-height boxes produce moderate wind rush, and taller high-capacity carriers are the most noticeable at highway speeds.

    Some Thule models emphasize sleeker tapering, which can slightly reduce turbulence. Yakima designs sometimes prioritize interior volume, which can make them slightly taller. In everyday driving, placement and crossbars usually matter more than the logo on the box.

    For most Subaru owners, a properly positioned box produces a mild wind rush that blends into normal road noise.

    Fuel Economy Impact and “Leave-It-On” Practicality

    Best buy for minimizing fuel economy impact:

    Thule Motion XT Low (Amazon)

    Honorable mention:

    Yakima GrandTour Lo

    Both use lower-profile aerodynamic designs that reduce drag compared with taller cargo boxes, helping limit fuel economy loss during highway driving.

    Any roof box adds aerodynamic drag. The real question is how noticeable that impact becomes in everyday driving and whether it makes sense to leave the box installed between trips.

    Lower-profile boxes disturb airflow less than tall designs, so they usually cause the smallest drop in fuel economy. Wider boxes and blunt front shapes increase drag more quickly, especially at highway speeds. Mounting the box forward can help slightly by keeping it in smoother airflow.

    Between comparable sizes, Thule and Yakima perform similarly. Fuel economy changes are driven more by box height and shape than by brand.

    Whether you remove the box between trips usually comes down to driving habits. Regular highway commuters often remove the box to reduce drag and wind noise. If the carrier is used frequently for trips or weekend travel, leaving it installed is often more convenient.

    Ease of Install, Removal, and Living With It

    Best buy for easy install and removal:

    Thule Motion XT M (Amazon)

    Honorable mention:

    Yakima SkyBox 16 Carbonite (Amazon)

    Both use tool-free clamp systems that align quickly on most crossbars, making repeat installs and removal manageable for one person.

    Cargo boxes are often installed for trips and removed afterward. How easy that process feels in real life often determines whether owners actually take them off between uses.

    Most modern boxes use internal clamps that tighten around the crossbars from inside the carrier. Thule systems typically use torque-limiting knobs with wide clamp jaws that center easily on the bars. Yakima systems use similar quick-grip clamps that are simple and secure, though alignment can sometimes take a moment if the bars sit near the edge of the mounting range.

    After the first install, repeat installs become much quicker. Most setups take around 10–20 minutes once clamp positions are known. Many owners mark crossbar locations or leave clamps loosely positioned to speed things up.

    Handling the box itself is often the bigger challenge. Mid-size carriers are manageable for most people to install alone, while longer boxes can feel awkward to lift and position. A step stool or briefly resting the box on the rear hatch edge can make solo installs easier.

    In practice, removal usually happens because of garage clearance, fuel economy concerns, or daily driving comfort.

    Locking, Opening, and Access on the Side of the Car

    Best buy for dual-side access and secure latching:

    Thule Motion XT M (Amazon)

    Honorable mention:

    Yakima SkyBox 16 Carbonite (Amazon)

    Both offer dual-side opening and reliable locking systems that make curbside loading and everyday access easier in tight parking situations.

    How a cargo box opens affects everyday usability more than many buyers expect. Loading gear in tight parking lots, narrow driveways, or curbside spaces quickly reveals whether access works for your routine.

    Dual-side opening allows the box to be accessed from either side of the vehicle. This makes it easier to load from the curb, work around walls or garages, and reach gear without moving the vehicle. Single-side opening can still work but usually requires more careful parking.

    Most mid- and upper-tier models from both Thule and Yakima offer dual-side access, while some entry-level boxes open from only one side.

    Latch design also affects day-to-day usability. Thule typically uses centralized locking systems that prevent the key from being removed unless all latch points are engaged, providing clear feedback that the box is closed. Yakima latches engage smoothly and provide solid mechanical feedback when aligned correctly.

    Build Feel, Durability, and Long-Term Ownership

    Best buy for long-term durability:

    Thule Motion XT M (Amazon)

    Honorable mention:

    Yakima SkyBox 16 Carbonite (Amazon)

    Both have proven multi-year durability with solid hinge hardware, reliable latch systems, and weather-resistant seals that hold up well to regular travel and outdoor exposure.

    Cargo boxes spend years exposed to sun, weather, vibration, and repeated loading. Long-term durability depends less on marketing claims and more on how the box holds up in everyday use.

    Both Thule and Yakima build carriers designed for multi-year ownership. What matters most is how solid the box feels when opening and closing. Lid rigidity, hinge movement, latch engagement, and seal compression all influence how well a carrier ages.

    Boxes that close cleanly and latch without force tend to stay trouble-free longer. Hinges and hardware experience the most wear over time, so smooth operation and consistent alignment are good signs of durability.

    Large plastic lids naturally flex slightly when opened. Thule boxes often feel a bit more rigid when closing, while Yakima lids may show mild flex but remain durable in normal use.

    Over time, sun exposure gradually dulls finishes and can make plastics more brittle. Gloss finishes show scratches more easily but clean well, while matte textures tend to hide wear better.

    In long-term ownership, differences between Thule and Yakima are small. Both brands have strong reputations for weather resistance and structural durability.

    Choosing the Right Box Style First (Then Picking a Brand)

    Before comparing specific models, it helps to choose the right box style. Size and profile usually affect daily usability more than the brand itself.

    Low-profile: when comfort matters more than volume

    Low-profile cargo boxes prioritize quiet travel and everyday drivability over maximum storage. They sit closer to the roof, cut through the air more cleanly, and usually feel calmer at highway speeds.

    On a daily-driven Subaru, that difference is noticeable. Lower boxes tend to create less wind noise, feel more stable in crosswinds, and have a smaller impact on fuel economy. They also keep overall vehicle height down, which can help with garages and tight parking.

    The tradeoff is vertical space. Low-profile boxes don’t handle bulky suitcases or rigid bins very well. They work best with soft gear like duffels, jackets, sleeping bags, and compressible camping equipment.

    This style makes the most sense when the box stays on the car often. If you commute with it installed, drive long highway distances, or simply prefer a quieter ride, the aerodynamic benefits can outweigh the smaller capacity.

    Both Thule and Yakima offer well-shaped low-profile designs. In real use, differences are subtle, usually small variations in lid shape or finish rather than noticeable performance changes.

    For Subaru owners who prioritize comfort and quiet travel, low-profile boxes often feel like the easiest option to live with.

    Mid-size: the “most people” option for family travel

    Mid-size cargo boxes are the sweet spot for most Subaru owners. They add real storage space without the extra bulk, wind drag, or fit challenges that come with oversized carriers.

    This size comfortably handles the gear most families bring on trips—duffels, jackets, camping gear, sports equipment, and compact strollers. It frees up cabin space without making the roof setup feel oversized.

    Mid-size boxes are also easier to live with day to day. They usually clear the hatch more easily than longer carriers, create less wind noise than tall boxes, and remain manageable to install or remove.

    Going bigger can introduce tradeoffs. Larger boxes often increase wind noise, make hatch clearance more sensitive, and can push garage height limits. They also add more weight higher on the vehicle.

    Between Thule and Yakima, mid-size boxes perform very similarly. Differences usually come down to interior shape, lid opening width, or mounting adjustment range rather than overall usability.

    For most Outback, Forester, and Crosstrek drivers, mid-size boxes provide the best balance of capacity and everyday drivability.

    Large: when you truly need bulky capacity (and accept tradeoffs)

    Large cargo boxes are built for maximum storage. They make sense when smaller carriers simply aren’t enough—long trips, larger families, or bulky outdoor gear.

    The extra space can be helpful for coolers, winter gear, ski equipment, or multiple duffels. It also keeps the cabin clearer so passengers and pets have more room.

    But the tradeoffs are real. Larger boxes create more wind noise, catch crosswinds more easily, and reduce fuel efficiency at highway speeds. Their height and length also make the vehicle feel slightly different in strong winds.

    Fitment becomes more sensitive too. Large carriers extend farther rearward, which increases the chance of hatch interference—especially on the Outback. Proper crossbar placement and forward positioning become important.

    In general:

    • Low-profile boxes are quiet and efficient but smaller

    • Mid-size boxes balance storage and drivability

    • Large boxes offer maximum capacity but bring the biggest impact on noise and fit

    Across brands, differences usually come down to mounting adjustment, rear taper shape, and interior layout. In most cases, choosing the right size matters more than choosing a specific brand.

    Large boxes work best when you consistently need the extra space. If the need is occasional, a mid-size carrier is usually easier to live with.

    Crosstrek vs Forester vs Outback — What Changes Brand-to-Brand

    Even with the same cargo box, Subaru models behave slightly differently. Roof length, height, and hatch design all affect how the setup feels in real use.

    Crosstrek: shorter roof, tighter fit tolerance

    The Crosstrek’s roof is shorter and more compact than the Forester or Outback. That smaller footprint leaves less room to position a cargo box, which makes fitment more sensitive to box length, mounting adjustment, and crossbar spacing.

    A carrier can technically fit and still feel cramped if it can’t sit in the right spot. With less front-to-rear space available, boxes often end up closer to the hatch than ideal, and rear overhang becomes noticeable sooner than on the larger Subaru models.

    Compact carriers tend to work best here. Low-profile and mid-size boxes are usually easier to position and keep the load balanced on the shorter roof. Longer boxes can still work, but they often require more careful placement.

    Crossbar spacing matters more on the Crosstrek than on the other models. Maximizing bar spread within the rail limits improves stability and gives the box more freedom to sit forward. Narrow or fixed bar spacing can force compromises even when the carrier is technically compatible.

    Across brands, the biggest difference comes from mounting adjustment rather than compatibility claims. Boxes with longer mounting tracks or more clamp travel are easier to position correctly on the shorter roof.

    Key takeaway: Compact low-profile or mid-size boxes with generous mounting adjustment are usually the easiest fit on the Crosstrek’s shorter roof.

    Forester: tall vehicle, noise and height feel different

    The Forester’s taller ride height changes how roof cargo feels in daily driving. Because the roof sits higher in the airflow, wind exposure increases and roof-mounted gear tends to feel more noticeable than on the Crosstrek or Outback.

    That height amplifies a few things. Wind noise becomes more apparent at highway speeds, crosswinds have more leverage on the carrier, and total vehicle height climbs quickly once gear is installed.

    Box profile matters more than brand here. Low-profile carriers usually stay quiet enough for everyday driving, while mid-height boxes introduce more wind rush. Taller boxes and stacked loads increase both noise and drag because they sit directly in stronger airflow.

    Height clearance also becomes a daily consideration. With a box installed, total vehicle height can approach the limits of garages, parking decks, and drive-throughs.

    Loading can take a little more effort as well. Reaching the center of the carrier is harder on a taller vehicle, so many owners use a small step stool or door-sill step when loading gear.

    Across brands, differences mostly come down to box shape. Lower, tapered designs reduce wind exposure and noise, while taller designs trade comfort for additional capacity.

    Key takeaway: Lower-profile cargo boxes usually feel quieter and more stable on the Forester’s taller roof.

    Outback: long roof but hatch clearance still decides everything

    The Outback’s long roof makes it one of the easiest Subarus to work with when installing a cargo box. The extra length allows better weight distribution and more flexibility in where the carrier can sit.

    But hatch clearance still determines whether the setup works smoothly in daily use.

    The Outback’s rear hatch swings upward and slightly forward as it opens. If the rear of the cargo box sits too far back, the hatch can contact the box or stop short before fully opening.

    This makes hatch clearance the pass-or-fail test for any setup. Interference usually happens when the box extends behind the rear crossbar or cannot be positioned far enough forward.

    Before settling on placement, it’s worth confirming clearance in real conditions:

    • Mount the box where you plan to run it

    • Open the hatch fully, not just partially

    • Check clearance on level ground and slight inclines

    • Make sure the cargo area is still comfortable to access

    Compared with the other Subaru models, the fit challenges are different. The Crosstrek has less roof space overall, the Forester emphasizes height and wind exposure, and the Outback mainly demands proper rear clearance.

    The Outback handles mid-size and large carriers comfortably, but placement still matters. Longer boxes increase hatch risk more than wider ones.

    Across brands, differences usually come from mounting track length and rear taper shape. Boxes with longer mounting tracks and a tapered rear profile tend to clear the hatch more reliably.

    Key takeaway: The Outback fits larger carriers easily, but hatch clearance always depends on how far forward the box can be positioned.

    Common Buying Mistakes When Comparing Thule and Yakima

    Before choosing between brands, it’s worth avoiding a few common mistakes that make cargo box setups harder to live with.

    Picking based on cubic feet instead of usable packing

    Cargo box volume is easy to compare, but it rarely tells the full story. Two boxes with similar cubic-foot ratings can carry very different amounts of gear depending on their shape and interior layout.

    Much of the listed volume sits in areas that are hard to use. Tapered noses reduce width near the front and rear, curved lids limit stacking height, and mounting hardware can take up space on the floor of the box. Narrow openings can also make bulky items harder to load even when the box technically has enough capacity.

    In real use, interior shape matters more than the number on the spec sheet. Boxes with wide, smooth interiors tend to pack soft gear more efficiently, while aggressive tapering trades packing space for aerodynamics.

    This matters because most Subaru roof loads are compressible items—duffels, jackets, sleeping bags, and camping gear. A box that accommodates those shapes well can feel larger in practice than one that simply lists more cubic feet.

    Across brands, packing usability varies more by model than by manufacturer. Interior contour, rear taper shape, and lid opening width usually make a bigger difference than brand name.

    The practical approach is to treat cubic feet as a rough comparison rather than the deciding factor. Focus on interior shape and how your actual gear packs.

    Ignoring carrier weight and roof limits

    Many buyers focus on storage space and forget that the carrier itself uses part of the roof’s weight limit. On most Subarus, the dynamic roof rating is around 150 pounds. That total includes crossbars, the carrier, mounting hardware, and everything packed inside.

    A cargo box weighing 40–55 pounds can consume a large portion of that capacity before any gear is added. Once loaded, it’s easy to approach the limit without realizing it.

    Different carriers vary in weight depending on size and construction, but the main issue is how the total load adds up. Problems usually appear when buyers treat the roof rating as cargo capacity alone, combine multiple carriers, or pack dense items like tools or coolers on the roof.

    Even when the numbers technically work, heavy roof loads can make the vehicle feel less stable.

    A simple rule helps avoid this: start with the vehicle’s roof rating, subtract the weight of bars and the carrier, and treat the remaining number as the limit for gear. Lighter, bulkier items are usually better suited for the roof, while dense gear stays more stable inside the vehicle.

    Roof limits are a safety guideline, not a packing goal. Staying comfortably below the limit usually results in a quieter and more stable drive.

    Assuming aftermarket bars “fix” a too-long box

    Upgrading crossbars can improve stability and placement flexibility, but they cannot fix a cargo box that is fundamentally too long for the vehicle.

    Stronger or adjustable bars can allow wider spacing, reduce flex, and make it easier to position a carrier precisely. Those improvements can help fine-tune placement, but they don’t change the overall length of the box or how far it extends beyond the mounting points.

    If the rear of the box sits too far behind the rear crossbar, hatch interference and poor weight balance are still likely. Limited mounting track adjustment on the box itself can create the same problem.

    This misconception usually comes from the idea that better crossbars increase usable roof space. In reality, fitment is limited by three things: the mounting adjustment range on the box, the crossbar spread allowed by the roof rails, and the hatch opening arc.

    Both Thule and Yakima offer adjustable bar systems that help with placement, but successful fitment usually depends more on the box’s mounting range and overall length.

    If a carrier barely clears the hatch or sits far rearward, the better solution is usually a shorter box or a model with longer mounting tracks.

    Buying for the one big trip, not normal trips

    It’s tempting to choose the largest cargo box available to prepare for a single big road trip. The problem is that most driving happens outside those peak trips.

    Oversized carriers often introduce everyday tradeoffs. Larger boxes are harder to position forward, which increases the risk of hatch interference. They also add more wind noise, increase drag, and can reduce garage clearance. Bigger carriers are heavier and more awkward to install or remove between trips.

    What feels like extra capacity “just in case” often becomes unnecessary bulk during normal driving.

    Most trips involve soft luggage, jackets, sports gear, or weekend travel items. These pack efficiently and rarely require maximum box volume. A mid-size carrier often handles real-world packing while keeping noise, height, and drivability under control.

    Both Thule and Yakima offer similar size ranges, so the bigger decision is choosing the right size for how you actually travel.

    A good rule is to size the box for normal trips rather than the rare extreme load. Occasional overflow can usually be handled with better packing, shifting heavy items inside the vehicle, or adding a hitch carrier when needed.

    The best setup is the one that works comfortably in everyday driving, not just on the biggest trip of the year.

    What to Check Before You Buy (Practical Checklist Without Hype)

    Before purchasing a cargo box, a few quick checks can prevent most fit problems and long-term frustrations.

    Measure/confirm crossbar spacing and usable mounting zone

    Cargo box fit depends as much on crossbar placement as on the box itself. A carrier may be compatible on paper but still sit in a poor position if the bars fall outside the box’s mounting range.

    Start with a few simple measurements:

    • Distance between the front and rear crossbars

    • Distance from the rear crossbar to the top of the hatch opening

    • Available space forward of the front bar before the box approaches the windshield area

    These numbers determine whether the box can sit far enough forward to maintain hatch clearance and balanced weight.

    Mounting range often matters more than box length. Most boxes attach using sliding clamps within a fixed track. If your bar spread falls outside that range, the box may have to sit farther back to reach both bars. That can create hatch interference even when the roof has plenty of space.

    Crossbar design also affects flexibility. Fixed or integrated bars limit placement options, while adjustable aftermarket bars allow you to fine-tune spacing and positioning. In many cases, that adjustment matters more than brand choice.

    Before buying, confirm a few basics:

    • Your crossbar spread fits within the carrier’s mounting range

    • The box can sit forward without clamp interference

    • Hatch clearance looks workable based on estimated placement

    A box that mounts securely but sits too far back quickly becomes frustrating in daily use. Confirming spacing and mounting range ahead of time prevents most fit problems.

    Confirm hatch swing clearance strategy

    A cargo box can mount securely and still interfere with the rear hatch. On many Subarus, especially the Outback, the hatch swings upward and slightly forward as it opens. If the rear of the box sits too far back, the hatch may stop short or contact the carrier.

    What matters most is where the rear of the box sits relative to the rear crossbar. Even a few inches of overhang behind the bar can create interference once the hatch swings upward.

    Preserving clearance usually means pushing the box as far forward as the mounting range allows. Ideally, the rear edge of the box sits close to, or slightly ahead of, the rear crossbar rather than extending behind it.

    Box shape can also influence clearance. Models with a tapered rear profile often allow the hatch to swing farther than boxes with a square rear design.

    Once mounted, take a moment to test it:

    • Open the hatch slowly and confirm full clearance

    • Check on slight inclines where the hatch arc changes

    • Make sure cargo access is comfortable, not just possible

    Hatch clearance is essentially a pass-fail test. A setup that barely clears often becomes annoying very quickly.

    Decide if you’ll remove it between trips (storage + lifting reality)

    Cargo boxes are easiest to live with when they match how often you plan to use them. The real question isn’t installation difficulty—it’s whether you’ll realistically remove and store the box between trips.

    Most carriers weigh 35–60 pounds and are bulky to maneuver overhead. Even lighter boxes can feel awkward when lifting above shoulder height or aligning clamps on the roof.

    Before buying, think through the routine:

    • Can you lift and position it alone?

    • Will you need a second person each time?

    • Do you have a step stool or stable platform?

    If removal requires help every time, the box may end up staying on the roof longer than planned.

    Storage space matters too. Many boxes exceed seven feet in length, which limits where they can live when off the vehicle. Ceiling hoists, wall mounts, floor storage, or a shed are common solutions.

    Most attachment systems become predictable after a few installs. The differences that matter over time are clamp alignment, tool-free tightening, and how easily the clamps find the bars during placement.

    Whether the box stays on the roof usually comes down to daily driving habits. Limited garage clearance, wind noise, or fuel economy concerns push people toward removing it. Frequent trips, inconvenient storage, or a quiet low-profile carrier often lead owners to leave it mounted.

    The key is being realistic about lifting and storage. If removal feels like a chore, it probably won’t happen often. Choosing a size and setup you can manage alone makes the box far easier to live with.

    Final Recommendation

    If you want one cargo box that works well across most Subaru setups, the Thule Motion XT M is the safest overall choice. It balances size, hatch clearance flexibility, noise control, and everyday usability better than most alternatives.

    FAQs

    Is Thule or Yakima easier to fit without blocking the Outback hatch?

    Neither brand guarantees hatch clearance. Forward adjustment range and box shape matter more. Models with longer mounting tracks and a tapered rear are easier to position so the hatch opens fully.

    Do Thule boxes run quieter than Yakima on the highway?

    Noise differences are minimal between comparable box shapes. Profile height, placement, crossbar type, and driving speed influence sound far more than brand. Both can be quiet enough for daily driving.

    Does either brand work better with factory Subaru rails and crossbars?

    Both brands work well with factory systems. Fit depends more on crossbar spacing, bar adjustability, and how far forward the box can be positioned. Aftermarket bars improve placement flexibility, not capacity.

    Which matters more for Subaru use: box length or mounting slot range?

    Mounting slot range matters more. A shorter box can still block the hatch, while a longer box with sufficient fore-aft adjustment can often be positioned to clear it.

    Are larger boxes worth it on a Crosstrek, or do they become a hassle?

    Large boxes can work, but they reduce clearance tolerance and increase wind sensitivity and handling changes. For daily use, mid-size boxes are typically more practical and easier to live with.

    If I plan to remove the box often, what should I prioritize?

    Prioritize tool-free clamps, easy alignment, manageable weight, and good handholds. Lighter boxes with simple mounting systems make frequent removal realistic.

    Can the same cargo box work across Crosstrek, Forester, and Outback?

    Yes, if the size is appropriate. Mid-size boxes transfer best between models, while longer boxes may overwhelm a Crosstrek. Always recheck hatch clearance and bar spacing when switching vehicles.

    Final Thoughts

    There’s no perfect cargo box setup for every Subaru. The right choice depends on how you use your Crosstrek, Forester, or Outback, what gear you carry, and how much noise, height, or extra drag you’re willing to live with.

    For many owners, comfort and everyday usability matter more than maximum capacity. Others need the extra space and accept the tradeoffs that come with larger boxes. The key is choosing a setup that fits your normal trips rather than the biggest haul of the year.

    Fitment almost always matters more than brand. Hatch clearance, mounting adjustment, roof size, and box shape determine whether a cargo box feels easy to live with or constantly in the way.

    Once you’ve narrowed down the right size and style, the next step is comparing specific box models. That’s where small design differences start to matter, especially when you’re trying to dial in the best fit for a Crosstrek, Forester, or Outback.

    If you’re deciding between Thule and Yakima:
  • Roof Weight Limits for Crosstrek, Forester, and Outback

    Roof storage expands what a Subaru can carry, but weight limits are one of the most misunderstood parts of using the roof safely. Many Crosstrek, Forester, and Outback owners assume that if gear fits and mounts securely, it’s safe to drive with — but roof weight affects handling, braking, and stability in ways that aren’t always obvious. Roof load limits aren’t just about preventing damage; they preserve predictable handling and safety margins across varied driving conditions.

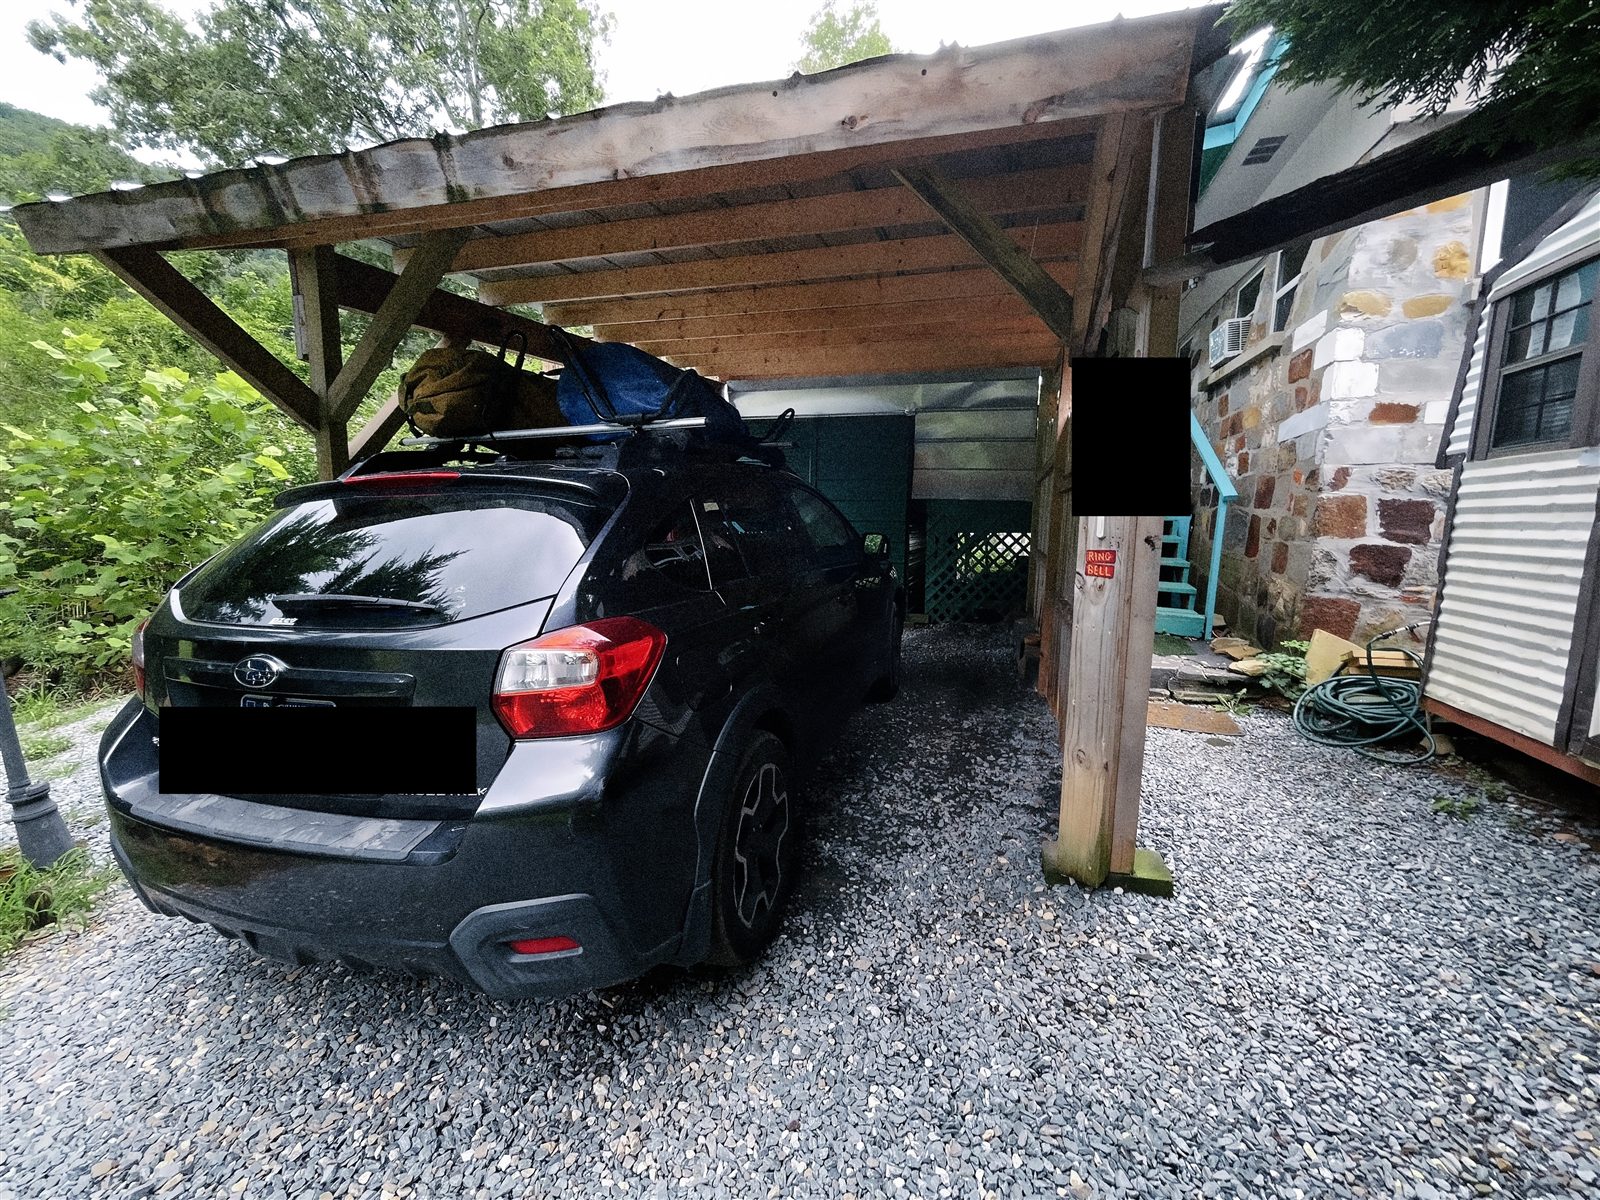
    Subaru Crosstrek loaded with gear under a carport

    Dynamic vs Static Weight Limits

    Confusing these two is one of the most common mistakes owners make. Dynamic weight limit is how much the roof can safely carry while the vehicle is moving — it accounts for braking, cornering, wind, and bumps, so it’s the lower, more conservative number. This is the number that applies any time you’re driving with a cargo box, bikes, or kayaks. Static weight limit is how much the roof can support while parked, with no dynamic forces acting on it — much higher, and what allows a rooftop tent to support occupants when stationary. Driving = dynamic limit. Parked = static limit. Don’t confuse the two.

    Vehicle Limit vs Crossbar Limit

    The vehicle roof limit reflects what the roof structure and mounting points can safely support. The crossbar limit is how much the bars themselves can support. In practice, the lowest-rated component determines your safe limit — if your vehicle roof rating is 176 lbs and your crossbars are rated for 150 lbs, your effective limit is 150 lbs. Upgrading to stronger crossbars can improve stability and flexibility, but it does not increase the vehicle’s roof capacity, since the vehicle rating remains the ceiling either way.

    Roof Weight Limits by Model

    All three models carry a similar dynamic roof rating — around 150 lbs while driving, including the weight of crossbars, carriers, and everything mounted on top. Always confirm the exact rating for your model year in the owner’s manual; the real differentiator between models isn’t the number, it’s how easily that capacity translates into a usable setup.

    The Crosstrek’s smaller roof footprint makes weight distribution and gear size matter more — a mid-size cargo box with luggage, two bikes, or a single kayak are typical, but a 40-50 lb cargo box plus gear can use most of the available capacity quickly. The Forester’s taller, boxier roof creates a larger usable loading area, comfortably supporting a mid-size or large cargo box, two to three bikes, or one to two kayaks — though its height means added weight has a more noticeable effect on body roll and crosswind sensitivity. The Outback’s longer roof provides the most usable space and the easiest weight distribution across the bars, supporting large cargo boxes, multiple bikes, or kayaks and paddleboards for family travel — note that integrated crossbars on many Outback models simplify setup but don’t increase capacity, and their fixed spacing can concentrate weight if loads aren’t positioned carefully.

    How Roof Weight Affects Real-World Driving

    Weight on the roof affects handling more than the same weight inside the cabin, since it sits above the vehicle’s center of gravity. Even moderate roof loads can bring increased body roll, slower steering response, greater crosswind sensitivity, and a less-planted feel at highway speeds — more noticeable with taller loads, uneven distribution, or gear mounted high above the roofline. Slowing down on curves, increasing following distance, and avoiding abrupt maneuvers all help offset this. Repeated heavy roof loads also add long-term stress to mounting points and rail hardware, so periodic inspection matters if you carry gear regularly.

    How Much Weight Common Gear Actually Uses

    Most hard-shell cargo boxes weigh 35-60 lbs empty, and once loaded with luggage or camping gear, total weight can quickly reach 80-150 lbs — approaching the dynamic limit of many Subaru models before you’ve accounted for anything else riding along. Kayaks typically weigh 40-70 lbs, and bike racks add 8-20 lbs per tray — two bikes with rack weight included can add 60-100 lbs. Height and wind exposure matter as much as raw weight: kayaks catch crosswinds and can introduce steering sensitivity, while upright bike mounts increase drag and can sway if not tightened properly. Always include carrier and rack weight in your total load calculation, not just the gear itself.

    Do Aftermarket Crossbars Increase Your Roof Limit?

    No. The maximum weight your roof can safely carry is set by the manufacturer, based on roof structure strength and mounting points — crossbars have their own load ratings, but these never override the vehicle limit. Safe capacity is always determined by the lowest-rated component in the system: vehicle roof rating, roof rails or mounting points, crossbars, and carrier hardware. Aftermarket bars can feel stronger and reduce flex under load, and wider spread does help with fit and stability (see Subaru Factory Roof Rails vs Aftermarket Crossbars) — but they do not make the roof itself stronger.

    Example: Calculating Usable Roof Capacity

    Start with your vehicle’s dynamic limit, then subtract the weight of the carrier itself before adding gear — cargo boxes, baskets, and racks often weigh 30-60+ lbs empty, and that weight counts toward the total. For example, if your roof limit is 165 lbs and your cargo box weighs 45 lbs, you have about 120 lbs remaining for gear.

    Roof weight budget: an example calculation Equation-style graphic showing how to calculate usable roof capacity: roof weight limit of 165 pounds, minus a 45 pound cargo box, equals 120 pounds remaining for gear. Roof limit 165lbs Cargo box 45 lbs = Usable capacity 120lbs Your numbers will vary — check your owner’s manual for your exact limit

    After the math, keep weight centered between the crossbars and balanced side to side — place heavier items in the middle rather than concentrated at the front or rear edge, keep loads low inside boxes or baskets, and tighten mounts after final positioning. Poor distribution can create instability even when total weight stays within limits. Finally, the same load behaves differently depending on conditions: high winds, mountain driving, and heavy braking all increase effective stress on a roof load, so easing off in rough conditions matters even when you’re technically within the rated limit.

    Signs You May Be Overloading Your Roof

    Exceeding roof limits doesn’t always produce immediate failure — warning signs usually show up first in how the vehicle feels or how the rack behaves: increased body roll, excessive sway in crosswinds, noticeable rail or bar flex, hardware that keeps loosening, creaking or popping noises from the roof area, or subtle changes in how doors close after heavy loading. Even if total weight appears within limits, uneven distribution can create the same symptoms. If you notice these signs, reduce load weight, redistribute gear more evenly, and recheck mounting hardware.

    Common Mistakes

    • Assuming “it fits” means it’s safe. A carrier can mount securely while still exceeding safe weight limits once gear is loaded.
    • Ignoring carrier weight. Cargo boxes, baskets, and racks often weigh 30-60+ lbs before adding gear — that weight counts toward the roof limit.
    • Confusing static and dynamic ratings. The higher static rating only applies when parked — driving capacity is limited by the lower dynamic rating.
    • Overloading for a single trip. Packing extra “just this once” can push the roof beyond safe handling limits, especially at highway speed.
    • Believing aftermarket bars increase roof capacity. They may improve stability and fit, but the vehicle’s roof rating remains the true limit.

    FAQs

    What is the roof weight limit on a Subaru Outback?

    Most recent Outback models have a dynamic (driving) roof limit of about 150 lbs. Static capacity when parked is much higher, intended for rooftop tents. Always confirm the exact rating for your model year in the owner’s manual.

    Is the Crosstrek roof weaker than the Outback’s?

    Not weaker, but smaller and more sensitive to loading — the shorter roof area concentrates weight more, making distribution more important.

    Can I exceed the limit for short trips?

    No. The dynamic limit reflects safe handling, braking, and stability — exceeding it even briefly increases rollover risk and stress on mounting points.

    Does upgrading crossbars increase my roof capacity?

    No. Aftermarket bars may improve stability and spacing flexibility, but the vehicle roof rating remains the true limit.

    How much does a typical cargo box reduce my available weight?

    Most empty boxes weigh 35-60 lbs, which comes directly off your dynamic limit before you add any gear.

    How do I know if I’m too close to the limit?

    Watch for increased body roll, crosswind sway, bar flex, or hardware that keeps loosening — these often show up before anything fails outright.

    Final Thoughts

    Roof weight limits come down to a simple hierarchy: the lowest-rated component in the system sets your true ceiling, dynamic (driving) limits are always lower than static ones, and aftermarket crossbars improve fit and stability but never raise the vehicle’s actual capacity. Subtract carrier weight first, distribute what’s left evenly, and ease off in rough conditions — that covers most of what actually matters for safe roof loading on a Crosstrek, Forester, or Outback.

    Related Guides

    Subaru Factory Roof Rails vs Aftermarket Crossbars

    Cargo Box vs Cargo Basket on a Subaru Outback

    How Crossbar Spacing Affects Hatch Clearance

    Best Cargo Box for Subaru Outback

    Best Cargo Box for Subaru Forester

    Best Cargo Box for Subaru Crosstrek

    How Much Weight Can Subaru Crossbars Hold?

    Sleeping in a Subaru Crosstrek

  • Will Aftermarket Crossbars Improve Cargo Box Fit on an Outback?

    Cargo boxes are one of the most useful upgrades for a Subaru, but getting one to fit properly on an Outback can be more complicated than expected. Many owners discover that a box can technically mount to the roof yet still interfere with the rear hatch or feel awkward in daily use.

    This usually comes down to positioning and how the hatch moves rather than overall box size.

    Unlike builds designed for extreme use, most Crosstrek, Forester, and Outback owners are balancing everyday driving with weekend trips, seasonal gear, and family travel. When a box limits hatch access or feels unstable at highway speeds, it becomes a daily inconvenience rather than a convenience.

    The Outback, in particular, has a roof design and hatch movement that make positioning more sensitive than many drivers anticipate. Crossbar spacing, mounting track range, and roof geometry all influence where a box can sit, and small differences can determine whether the setup feels seamless or frustrating.

    The type of crossbars you’re using often determines how much adjustment you actually have.

    Aftermarket crossbars are often suggested as a solution, but they do not change the size of the roof or the shape of the vehicle. What they can change is positioning flexibility. Knowing when that flexibility helps and when it does not makes it easier to decide whether an upgrade will actually improve your setup.

    They are most useful when crossbar spacing is the main limitation, not overall box size.

    Why Cargo Box Fit Can Be Challenging on an Outback

    Cargo boxes often fit the roof of an Outback but still create problems in real use. The challenge is not overall roof size. It is how the hatch opens, where the crossbars sit, and how far forward the box can be positioned.

    The Outback’s rear hatch swings upward and slightly forward as it opens. If the rear edge of a cargo box extends past the rear crossbar, the hatch can contact the box before reaching full height. That turns everyday tasks like loading groceries or accessing a stroller into a repeated workaround.

    Built-in crossbars on many Outbacks add another constraint. Their fixed spacing limits how far forward a box can be mounted. If the mounting slots on the box cannot align while positioned forward, the box is forced rearward, where hatch interference becomes more likely.

    Their fixed spacing is one of the most common reasons boxes end up sitting too far back.

    Roof shape also plays a role. The roof tapers toward the rear, reducing usable flat space for mounting longer carriers. Even when a box fits within weight limits and bar spread requirements, placement flexibility can still be limited.

    In practical terms, fit issues usually come down to positioning rather than capacity. A box that sits slightly too far back can affect hatch access every time you use the vehicle, while a properly positioned box feels seamless in daily driving.

    How Factory Crossbar Spacing Affects Fit

    Once you understand why hatch clearance is so sensitive on the Outback, factory crossbar spacing is usually the next limiting factor. It determines where a cargo box can sit on the roof. On many Outback models, the bars are fixed or have limited adjustment, which means the mounting points on the box must align within a narrow range.

    Cargo boxes attach using clamps that slide within tracks or fixed slots on the underside of the box. If the crossbars sit closer together than the slot range allows for forward placement, the box must shift rearward so the clamps can align. This is a positioning limitation, not a strength issue.

    Narrow spacing becomes more noticeable with longer boxes. To keep both mounting points supported, the rear of the box may extend past the rear crossbar, increasing the chance of hatch interference and reducing easy access to the cargo area.

    Factory spacing works well for mid-size boxes designed around standard spreads. Fit problems tend to show up when the box is longer, the mounting tracks are short, or you need forward placement to preserve hatch clearance.

    In real use, the limitation is not whether the box mounts securely. It is whether the bars allow it to sit in the right place.

    What Aftermarket Crossbars Change

    If factory spacing is forcing the box into a compromised position, aftermarket crossbars can help. Their value comes from added placement options. They change positioning flexibility more than load capacity by allowing you to adjust bar spacing and placement so the box can sit where it works best rather than where fixed spacing forces it.

    With adjustable spacing, the bars can be set farther apart to better match the mounting tracks on a cargo box. That often allows the box to sit farther forward while keeping both mounting points properly supported. On an Outback, that forward placement can be the difference between full hatch access and constant interference.

    Adjustability also helps when mounting tracks and bar spacing do not align well. Instead of forcing the box rearward to reach both bars, you can move the bars to match the box’s clamp range. This improves fit without compromising stability.

    Aftermarket bars may also sit slightly higher above the roof, which can create more clearance for clamp hardware and mounting components. While subtle, this can make installation easier and reduce interference with roof contours.

    In practical terms, aftermarket crossbars do not make the roof stronger or longer. They make it easier to position equipment correctly, which improves hatch clearance, stability, and everyday usability.

    On Outback models with integrated crossbars, switching to aftermarket systems also means giving up that built-in convenience in exchange for a more adjustable but more involved setup.

    When Aftermarket Crossbars Do NOT Improve Fit

    That added flexibility has limits. Aftermarket crossbars can improve positioning, but they cannot change the physical constraints of the Outback’s roof and hatch movement. If a cargo box exceeds the usable roof length, clearance problems may remain even with adjustable spacing.

    In those cases, switching to a different box design is usually more effective than changing bars.

    Very long boxes can still interfere with the hatch because the Outback’s roof tapers toward the rear and the hatch swings forward as it opens. If the rear edge of the box extends too far past the rear crossbar, repositioning alone may not prevent contact.

    Mounting track limitations can also restrict improvement. Some cargo boxes have short or fixed clamp ranges that prevent meaningful forward adjustment. In those cases, adjustable bar spacing provides little benefit because the box itself dictates placement.

    Height and roof contour constraints may still affect fit. Taller mounting hardware or box shapes that sit high above the roof can increase interference risk, especially near the rear hatch arc.

    Finally, if your current setup already allows full hatch clearance and stable mounting, switching to aftermarket bars will not improve fit. Their value shows up only when positioning flexibility is the limiting factor.

    In practical terms, aftermarket crossbars help when fit is constrained by spacing. They do not solve problems caused by box length, mounting design, or roof geometry.

    Outback vs Crosstrek vs Forester Fit Sensitivity

    This is also why owners have different experiences across Subaru models. Cargo box fit sensitivity varies because of hatch movement, roof shape, and crossbar flexibility. The differences are not extreme, but they influence how precise your setup needs to be.

    Outback:

    The Outback is the most sensitive to positioning. Its rear hatch swings upward and slightly forward, reducing clearance behind the rear crossbar. The roofline also tapers toward the rear, which shortens usable mounting space. Small positioning differences can determine whether the hatch opens fully or contacts the box. Models with integrated crossbars add another constraint because spacing is fixed.

    Crosstrek:

    The Crosstrek is generally more forgiving. Its hatch opens in a more vertical arc, which reduces forward interference. The shorter roof means boxes sit closer to the windshield airflow zone, but clearance issues are less common. Raised rails with adjustable crossbars also allow easier forward positioning when needed.

    Forester:

    The Forester offers the most usable roof space. Its taller, more upright rear hatch opens with less forward travel, increasing clearance margin. Adjustable crossbar spacing makes it easier to fine-tune placement for longer boxes or different carriers.

    In practical use, the Outback demands more precise positioning, while Crosstrek and Forester setups provide a wider margin for adjustment. If hatch clearance has been a recurring issue, the Outback benefits the most from careful placement and adjustable bar spacing.

    Other Factors That Influence Cargo Box Fit

    Even with the right bar spacing, fit is not determined by one variable. Crossbar spacing plays a major role, but cargo box design, mounting hardware, and roof geometry also influence how well a box positions on your Subaru.

    Cargo box mounting range

    Boxes attach using sliding tracks or fixed mounting slots. The adjustment range determines how far forward the box can sit. Boxes with longer track systems allow more positioning flexibility, while short slot ranges can force the box rearward even when roof space is available.

    Box shape and taper

    Overall length matters, but shape matters more. Boxes with tapered rear sections or raised noses often clear the hatch better than square-ended designs of similar length. Low-profile boxes also tend to sit more cleanly within the roofline.

    Lower-profile designs also tend to reduce wind noise compared to taller or more exposed setups.

    Usable roof length

    The flat mounting area between the windshield transition and the rear hatch determines real placement space. If the box extends beyond this usable zone, clearance problems may occur regardless of crossbar setup.

    Mounting hardware footprint

    Clamp size and placement can limit positioning. Larger clamps or fixed mounting points may prevent forward placement, especially on integrated bar systems.

    Bar height above the roof

    Bars that sit higher above the roof can slightly improve clearance by changing the arc relationship between the hatch and the box. This does not solve major fit issues, but it can provide a small margin of improvement.

    In real use, fit is determined by how these factors work together. When a box refuses to position correctly, the limitation is often mounting range or roof geometry rather than overall box size.

    Is Upgrading Worth It?

    With those constraints in mind, the upgrade decision usually comes down to whether positioning is causing real problems. Upgrading to aftermarket crossbars is worthwhile when positioning flexibility is the limiting factor in your setup. If your cargo box sits too far back, interferes with the hatch, or cannot align properly with factory spacing, adjustable crossbars often solve those problems by allowing wider spread and better forward placement.

    This is where differences between factory rails and aftermarket systems become most noticeable in real use.

    For larger or longer boxes, the ability to fine-tune spacing can improve stability and preserve hatch clearance. Adjustable bars also make life easier if you switch between carriers or seasonal gear that require different mounting distances.

    However, an upgrade does not guarantee a better fit. If the box exceeds the usable roof length, has limited mounting range, or is poorly matched to the vehicle’s roof geometry, aftermarket bars may provide little improvement. In those cases, a different box design may be more effective.

    Factory rails remain sufficient for mid-size boxes, occasional trips, and setups that stay consistent. They minimize cost, installation time, and ongoing adjustment.

    Upgrading makes the most sense when fit limitations create daily frustration or when roof gear is part of regular use. If your current setup works without interfering with access or stability, the added expense and complexity may offer little real benefit.

    FAQs

    Will aftermarket crossbars always fix hatch clearance issues?

    No. They improve positioning flexibility, but box length and design still matter.

    Do I need aftermarket bars for a cargo box on an Outback?

    Most mid-size boxes fit factory rails. Aftermarket bars help when positioning becomes limited.

    How much forward adjustment do aftermarket bars provide?

    They allow crossbar spacing to be fine-tuned, which can move the box forward several inches.

    Can a cargo box still be too long even with aftermarket bars?

    Yes. If the box exceeds usable roof length, clearance issues may remain.

    Will aftermarket bars make installation harder?

    They require initial setup but offer more flexibility once installed.

    Do Crosstrek and Forester owners benefit the same way?

    They can, but the Outback benefits most due to tighter hatch clearance.

    Is upgrading worth it if I only take a few trips per year?

    Usually not unless you are experiencing clearance or positioning problems.

    Final thoughts

    Getting a cargo box to fit well on an Outback is less about capacity and more about positioning. Hatch movement, roof taper, and crossbar spacing all influence where the box can sit, and even small placement differences can affect daily usability. When the box sits in the right position, the setup feels seamless. When it does not, hatch access and loading quickly become frustrating.

    Aftermarket crossbars can improve fit when positioning flexibility is the limiting factor. Adjustable spacing makes it easier to move a box forward, align mounting points, and preserve hatch clearance. But they are not a universal fix. If the box is too long, the mounting range is limited, or the roof geometry is working against you, changing bars alone may not solve the problem.

    There is no perfect setup. There are tradeoffs. Factory rails favor simplicity, lower cost, and convenience. Adjustable bars offer fit control and adaptability. The right choice depends on how often you carry gear, how sensitive your setup is to positioning, and whether your current configuration creates daily friction.

    For many owners, small adjustments or a better-matched box design provide the biggest improvement. Once you understand what affects fit, it becomes easier to evaluate bar spacing, box shapes, and mounting systems that suit real-world use. Future guides will look more closely at box sizing, positioning strategies, and setup choices that help refine a practical, frustration-free roof system.

    If you’re refining your setup further:

  • Do Aftermarket Crossbars Increase Wind Noise on a Subaru?

    Adding crossbars to your Subaru often raises one immediate question: how much noise will they create on the road? For Crosstrek, Forester, and Outback owners who rely on their vehicles for daily driving, even small changes in cabin sound can become noticeable over time.

    Most advice online focuses on extreme gear setups, but most Subaru owners are balancing everyday comfort with occasional hauling. Crossbars improve utility, but they also change airflow over the roof, which can affect sound, fuel efficiency, and long-drive comfort.

    The type of crossbars you choose plays a big role in how noticeable that noise becomes.

    Wind noise is not caused by a single factor. Bar shape, placement, accessories, and driving conditions all influence what you hear at highway speeds. Understanding these variables helps set realistic expectations and prevents frustration after installation.

    This guide explains how aftermarket crossbars affect wind noise in real-world Subaru use, what matters most, and how to keep your setup comfortable for everyday driving.

    WHY CROSSBARS CREATE WIND NOISE

    Wind noise from crossbars comes from airflow disruption. As air moves over the roof at highway speed, it strikes the bar and creates turbulence. That turbulence produces the humming, whistling, or low roar many drivers notice once bars are installed.

    Shape plays a major role. Round and square bars disturb airflow more abruptly, which can create louder noise. Aero-shaped bars smooth airflow and reduce turbulence, though placement and load still affect sound.

    Placement also matters. Bars positioned in stronger airflow near the front of the roof tend to be louder. Moving them slightly rearward can sometimes reduce noise.

    Attachments and hardware influence sound as well. Empty bars often produce a steady hum, while mounted gear can increase turbulence. Loose mounts, straps, or missing rubber channel strips can introduce vibration and whistling.

    Wind noise isn’t a defect, it’s airflow interacting with added hardware. Careful positioning and secure mounting reduce noise, but any crossbar setup changes how air moves over the vehicle.

    FACTORY VS AFTERMARKET BARS: WHAT TO EXPECT

    Factory roof bars balance usability, aerodynamics, and convenience. Integrated systems sit low and follow the roofline, which helps minimize airflow disruption when deployed and keeps noise low when stowed. Fixed spacing also keeps airflow behavior predictable.

    Aftermarket bars prioritize adjustability and load flexibility. They sit higher above the roof and often extend beyond the side rails, exposing more surface area to airflow. This can increase wind noise, especially with round or square designs. Aero-profile bars reduce the effect but do not eliminate it.

    That added flexibility is often what helps improve cargo box fit and positioning.

    Noise differences are most noticeable when bars are installed without gear. Factory systems tend to remain quieter due to their lower profile. Aftermarket bars may introduce a steady hum at highway speeds, particularly if positioned near the windshield airflow zone.

    The tradeoff is flexibility. Aftermarket bars allow spacing adjustments that improve cargo box fit, hatch clearance, and support for wider carriers, while factory systems favor simplicity and quicker setup.

    It’s also what allows better positioning to avoid hatch clearance issues.

    In real use, factory bars emphasize quiet operation and convenience, while aftermarket bars emphasize fit control and versatility.

    WHAT AFFECTS WIND NOISE MOST

    Wind noise is influenced by how airflow moves around anything mounted above the roofline. Small differences in shape, height, and placement can change how noticeable sound becomes at highway speeds.

    Bar shape matters. Aero bars guide airflow more smoothly and tend to be quieter. Round or square bars disrupt airflow more abruptly and can create a steady hum or whistle.

    Bar height and position also affect sound. Bars that sit higher or closer to the windshield meet faster-moving air, which amplifies noise. Moving bars slightly rearward can reduce this effect.

    Positioning changes often come down to crossbar spacing and how your setup is configured.

    Attachments often create more noise than the bars themselves. Empty trays, exposed hardware, and loose straps can whistle or vibrate in the wind. Even a quiet bar setup can become noisy once gear is added.

    Load shape matters as well. Smooth, low-profile carriers tend to stay quieter than tall or irregular loads, while loose items or straps can quickly become the loudest part of the setup.

    Wind noise usually results from several small factors rather than one major flaw.

    ACCESSORIES MATTER MORE THAN BARS

    In many setups, accessories create more wind noise and drag than the bars themselves. Empty racks, exposed trays, and loose hardware interrupt airflow in ways a bare bar often does not.

    Bike trays, ski racks, and utility mounts introduce edges and moving parts that catch air at highway speeds. Even when not carrying gear, these shapes can produce humming or whistling. Removing unused attachments often quiets the vehicle more than changing bars.

    Cargo baskets and exposed loads also disturb airflow. Irregular shapes, loose straps, and items sticking above the rack create turbulence over the roof. Securing gear tightly and keeping the load profile low helps reduce both noise and drag.

    Enclosed cargo boxes tend to smooth airflow and reduce noise compared to open setups.

    Small details add up. Tie-down straps that flap in the wind, loose end caps, and partially tightened mounts can create vibration sounds. A quick check before driving often prevents noise that feels like a larger problem.

    DIFFERENCES BY SUBARU MODEL

    Wind noise varies slightly between Subaru models due to roof shape, rail design, and vehicle height. The differences are subtle, but they can influence how noticeable crossbar noise feels in daily driving.

    On the Outback, integrated crossbars and a longer roofline help smooth airflow when stowed, but deployed bars sit higher in the air stream and can introduce noise at highway speeds.

    The Forester’s taller profile places crossbars higher in moving air, making noise more noticeable. Its upright shape also exposes accessories more directly to airflow.

    The Crosstrek’s lower height often produces slightly less wind noise with the same setup. However, the shorter roof places accessories closer to windshield airflow, which can create whistling if mounts or attachments are loose.

    In practice, setup choices usually influence noise more than the model itself.

    HOW TO REDUCE WIND NOISE

    Wind noise usually comes from disrupted airflow, not the bars themselves. Small adjustments often make a bigger difference than switching equipment.

    Placement is the first thing to check. Bars positioned too far forward can catch turbulent air from the windshield. Sliding the front bar slightly rearward may reduce whistling.

    Bar orientation matters. Many aero bars are directional, installing them backward can increase drag and noise. The thicker edge should face forward.

    Loose hardware and open mounting channels can create noise. Tightening clamps, sealing unused T-slots, and ensuring accessories sit flush prevents air from vibrating small gaps.

    If noise persists, these adjustments usually help:

    • Remove bars when not needed

    • Avoid placing bars in turbulent windshield airflow

    • Secure straps and trim excess ends

    • Keep accessories low and centered

    No roof setup is completely silent at highway speeds, but reducing turbulence keeps noise predictable and less noticeable.

    WHEN NOISE IS MOST NOTICEABLE

    Wind noise often goes unnoticed at low speeds, then becomes obvious once airflow builds. Many drivers first notice it between 40 and 60 mph. At highway speeds, it may become a steady background tone.

    Noise increases in headwinds or strong crosswinds because shifting airflow hits the bars and accessories at different angles. Gusty conditions can make sound fluctuate.

    It is also more noticeable in quieter driving environments. Smooth pavement and calm weather reduce competing sounds, making wind noise stand out.

    You’re most likely to notice it:

    • Above 50 mph

    • In headwinds or crosswinds

    • In cold, dense air

    • On quiet roads

    For many owners, the key question isn’t whether noise exists, but how often they’ll hear it.

    FAQs

    Are aftermarket crossbars louder than factory bars?

    Not always. Aero bars are often quiet; round and square bars are louder.

    Why do my bars whistle at highway speeds?

    Turbulence around the bar shape or mounting points can create whistling.

    Will a cargo box make noise worse?

    Usually quieter. A box smooths airflow compared to bare bars.

    Do Crosstrek and Forester setups create more noise?

    They can, since raised rails place bars higher in airflow.

    Should I remove crossbars when not in use?

    Removing them restores quiet driving and improves fuel economy.

    Can wind noise mean improper installation?

    Yes. Loose mounts or misalignment can cause vibration and whistling.

    FINAL THOUGHTS

    Adding crossbars changes how air moves over the roof, and some increase in sound is part of that reality. The real question is how noticeable it will be in daily driving. Bar shape, placement, accessories, and driving conditions influence noise far more than the bars themselves.

    Factory systems favor quiet operation and simplicity, while aftermarket bars prioritize fit flexibility and load versatility. Neither approach is perfect. Lower-profile setups tend to be quieter, while adjustable systems make it easier to position gear correctly.

    Small setup decisions often make the biggest difference. Securing straps, removing unused accessories, orienting bars correctly, and positioning them outside turbulent airflow zones can reduce noise more effectively than switching systems.

    If crossbars stay on year-round, minimizing turbulence improves daily comfort. If they’re installed only for trips, occasional wind noise is a reasonable tradeoff for added utility.

    Understanding what influences sound makes it easier to evaluate bar shapes, accessories, and mounting strategies. Future guides will explore setup choices that help refine a quieter, more comfortable roof system.

    If you’re dialing in your setup further:

  • How Crossbar Spacing Affects Hatch Clearance on a Subaru Outback

    Hatch interference is one of the most common surprises Subaru Outback owners encounter after installing a cargo box. The box fits the roof, installs securely, and looks fine, but the rear hatch suddenly stops short or contacts the carrier.

    This usually isn’t caused by box length alone. Crossbar spacing and mounting slot range often determine how far forward a box can sit, which directly affects hatch clearance.

    This is one of the main reasons cargo box fit varies so much between setups, even on the same vehicle.

    Understanding how spacing affects positioning helps you avoid daily frustration and unnecessary compromises. A few inches of placement flexibility can be the difference between full hatch access and constant workarounds.

    This guide explains why clearance issues occur, how crossbar spread influences fit, and when adjustments or aftermarket bars can solve the problem.

    Why Hatch Clearance Becomes an Issue

    How the Outback Hatch Opens

    The Outback’s rear hatch does not lift straight up. It swings upward and slightly forward as it opens, which means the top edge travels toward anything mounted behind the rear crossbar. This movement explains why carriers that technically fit the roof can still interfere with the hatch.

    Clearance is tightest in the final inches of travel. As the hatch reaches full height, the upper edge arcs forward, making contact with cargo boxes that extend too far rearward. Even small differences in overhang can determine whether the hatch clears cleanly or stops short.

    Power liftgates follow the same path but may stop early when resistance is detected. Manual hatches allow more control, but interference still occurs if positioning is off.

    In practice, clearance is determined less by overall box length and more by where the rear edge sits relative to the rear crossbar. Keeping that rear edge at or slightly forward of the crossbar usually allows the hatch to open fully.

    What Happens When Clearance Is Limited

    When clearance is limited, the issue appears immediately in daily use. The hatch may stop short, make contact with the box, or require careful handling each time it opens. What seems minor during installation quickly becomes frustrating when loading groceries, strollers, or gear.

    Contact can scratch paint, damage the box, or stress hinges over time. Power liftgates may stop automatically to prevent damage, reducing usable opening height.

    Limited clearance also changes how you use the vehicle. You may need to access the cargo area from the rear seat, open the hatch cautiously, or remove the carrier more often than planned.

    If clearance is only slightly restricted, repositioning the box forward often resolves the issue. When positioning cannot improve clearance, the tradeoff becomes reduced access or choosing a shorter carrier.

    How Crossbar Spacing Controls Positioning

    Crossbar spacing, the distance between the front and rear bars, determines how a cargo box sits on the roof and how far forward it can be positioned.

    The type of crossbars you’re using plays a big role in how much adjustment you actually have.

    A wider spread provides more control over placement. It allows a box to sit farther forward while keeping mounting points properly supported. This forward placement is often what preserves hatch clearance on the Outback.

    Narrow spacing limits adjustment. Cargo boxes attach using fixed mounting slots or tracks on their underside. When the bars sit close together, the mounting hardware reaches alignment limits sooner, forcing the box to shift rearward to secure properly.

    Longer boxes are affected most because they require more distance between mounting points to sit forward while remaining supported. This isn’t a strength issue, the box is secure, but its position is constrained by bar spacing and slot range.

    Boxes with longer mounting tracks allow more flexibility, while short slot ranges dictate final placement. This is why two boxes of similar length can behave very differently once installed.

    The goal is not maximum spread, but enough spacing to support the box while allowing forward placement that preserves hatch access.

    Why the Outback Is More Sensitive

    The Outback’s hatch geometry makes positioning more critical than on many vehicles. Because the hatch swings upward and forward, clearance margins are tighter near the rear of the roof.

    The roofline also tapers toward the rear, reducing usable flat mounting space. Even slight rear overhang can quickly lead to interference.

    Built-in crossbars on many Outback models add another constraint. Their fixed spacing limits how far forward a box can sit, making mounting slot range and box length more important.

    Factory crossbars are convenient, but their fixed spacing is often what limits forward placement.

    Crosstrek and Forester setups are generally more forgiving. Their hatch motion is more vertical, and raised rails often allow greater spacing adjustment. Clearance issues can still occur, but achieving a workable fit is usually less sensitive to small positioning differences.

    How Spacing Affects Cargo Box Fit

    Forward Placement Preserves Clearance

    Hatch clearance is usually preserved by moving the box forward, not by choosing a shorter one. When the rear edge sits at or slightly ahead of the rear crossbar, the hatch can open fully without interference.

    Accepting slight front overhang is typically the better tradeoff. A box extending slightly over the windshield area is less noticeable in daily use than one that blocks hatch access at every stop.

    When Boxes Sit Too Far Back

    A box can fit the roof yet create daily frustration if it sits behind the rear crossbar. The hatch may contact the box before fully opening, turning simple tasks into repeated workarounds.

    Boxes end up too far back for a few common reasons:

    • Narrow crossbar spacing limits forward adjustment

    • Short mounting slots restrict positioning range

    • Visual centering shifts the box rearward

    • Longer boxes require more spacing than available

    Rearward placement also increases leverage on the mounts, which can make movement or noise more noticeable at highway speeds.

    If the box cannot move forward enough, options are limited: accept partial hatch opening, reposition the bars if possible, or choose a shorter box.

    Hatch clearance: box too far back vs correctly positioned Two side-by-side Subaru silhouettes, each showing the rear hatch both closed (thin dashed line) and fully open (thick solid panel). Left: cargo box positioned too far back, past the rear crossbar, so the open hatch panel collides with it. Right: cargo box positioned with its rear edge at the crossbar, so the open hatch clears it. Box too far back Hatch hits the box Correct position Hatch clears cleanly Position matters more than box length — a few inches changes everything

    When Aftermarket Crossbars Help

    Aftermarket crossbars help when positioning flexibility is the main limitation rather than load capacity. Adjustable spacing allows you to place carriers farther forward, often restoring full hatch clearance.

    This is also where differences between factory rails and aftermarket systems become more noticeable.

    They are especially useful when a box cannot slide forward enough on factory spacing. By widening or shifting the spread, you gain more control over placement without switching to a shorter carrier.

    More placement options also make it easier to align clamps and fine-tune fit. If your setup feels constrained rather than overloaded, adjustable bars provide the flexibility to position gear where it works best.

    Quick Positioning Tips & Mistakes to Avoid

    Small adjustments during installation can make the difference between full hatch access and daily frustration.

    • Slide the box forward as far as the mounting slots allow.

    • Prioritize hatch clearance over visual centering.

    • Accept slight front overhang rather than rear interference.

    • Open the hatch slowly before final tightening.

    • Recheck alignment and clamp tightness after your first drive.

    If your box still feels limited, it usually comes down to spacing or mounting range rather than the box itself.

    Many clearance problems start with tightening everything before testing fit or choosing placement based only on appearance. Taking a few extra minutes during setup prevents daily workarounds later.

    FAQs

    Why does my cargo box hit the hatch if it fits the roof?

    Spacing and mounting slots may force it too far rearward.

    How far forward should the box sit?

    Ideally with the rear edge at or slightly ahead of the rear crossbar.

    Do longer boxes always cause problems?

    No, but they require more forward adjustment to clear the hatch.

    Can aftermarket crossbars fix clearance issues?

    Often yes, by allowing wider spacing and better positioning.

    Are Crosstrek and Forester setups more forgiving?

    Yes. Their hatch movement and adjustable bar spacing provide more margin for error.

    Should I accept front overhang to gain clearance?

    Usually. It is less inconvenient than blocking the hatch.

    Final Thoughts

    Hatch clearance issues rarely come down to a single measurement. They result from how hatch movement, crossbar spacing, and mounting slot range work together once a box is installed.

    There isn’t a perfect setup that eliminates every tradeoff. Moving a box forward may create slight front overhang, while keeping it centered can reduce clearance. The goal is not visual balance but daily usability.

    If your current setup opens cleanly and stays out of your way, you’ve found the right positioning. If it requires workarounds every time you access the cargo area, spacing and placement are worth revisiting.

    Understanding these relationships makes it easier to evaluate box sizes, mounting designs, and crossbar options with confidence. Future gear-specific guides will build on these fundamentals to help refine a setup that fits both your vehicle and your routine.

    If you’re dialing in your setup further:

  • Subaru Factory Roof Rails vs Aftermarket Crossbars

    Choosing between Subaru’s factory roof rails and aftermarket crossbars is less about capability and more about how your vehicle is used day to day. Crosstrek, Forester, and Outback owners rely on their vehicles for commuting, errands, family travel, and occasional trips, so roof setups that affect noise, access, and convenience become noticeable quickly.

    Factory rails are designed to make roof storage simple and predictable. They work well for common travel needs and require little setup. Aftermarket crossbars introduce adjustability and flexibility, which can solve fit and positioning challenges but add cost and complexity.

    Many owners only discover the differences after installing gear. Hatch clearance issues, wind noise, limited positioning range, or the need to swap carriers can turn a straightforward setup into something that requires ongoing adjustment. Understanding how each system behaves in real use helps prevent those frustrations.

    If you’re trying to improve cargo box fit specifically, how crossbar choice affects positioning becomes important.

    This guide focuses on practical decision-making rather than idealized builds. It looks at how factory rails and aftermarket crossbars affect everyday comfort, gear fit, and long-term usability so you can choose a setup that supports how you actually drive and travel.

    Disclosure: This article contains affiliate links. I may earn a commission at no extra cost to you.

    How Subaru Factory Roof Rails Are Designed

    Subaru factory roof rails are designed to support everyday utility without adding complexity. On Crosstrek, Forester, and Outback models, the rails are integrated into the roof structure and engineered to handle typical travel loads like cargo boxes, bike racks, and light recreational gear.

    Design details vary by model and year. Some vehicles use raised side rails that require separate crossbars, while others, most notably many Outback models, include integrated crossbars that fold out from the rails themselves. This integrated design prioritizes convenience, allowing owners to deploy the bars when needed and stow them when not in use.

    Factory systems are built around predictable spacing and weight limits. Crossbar spread is fixed or limited compared to aftermarket options, and the bars are shaped to balance strength, aerodynamics, and ease of use. This reduces guesswork, especially for owners who only use roof accessories occasionally.

    That fixed spacing can limit how gear fits, especially when hatch clearance becomes an issue on vehicles like the Outback.

    Weight ratings reflect vehicle safety and roof structure limits. The system is intended for common travel loads rather than heavy-duty hauling, prioritizing reliability and compatibility over maximum adjustability.

    Where Factory Rails Work Well

    Factory roof rails work best when the goal is simple, reliable roof storage without added setup or adjustment. They handle common travel needs and integrate cleanly with the vehicle, making them easy to use and live with.

    They perform well with mid-size cargo boxes, bike racks, and light recreational gear. For weekend trips, seasonal travel, or occasional hauling, fixed spacing and built-in compatibility remove guesswork and speed up installation. Many owners mount accessories once and leave the setup unchanged.

    Factory rails also suit drivers who value convenience over flexibility. Integrated crossbars deploy quickly, require no extra hardware, and store neatly when not in use, ideal for vehicles used primarily for daily transportation.

    In real use, factory rails are fully sufficient when loads are moderate, trips are occasional, and ease of setup matters more than fine-tuned positioning.

    When Aftermarket Crossbars Make More Sense

    Aftermarket crossbars become valuable when fit flexibility, not load capacity, is the limiting factor. If your setup requires precise positioning, wider spacing, or compatibility with specific carriers, adjustable bars solve problems factory rails cannot.

    They are especially useful with longer cargo boxes or carriers that need to sit farther forward to preserve hatch clearance. Fine-tuning crossbar spacing can be the difference between full hatch access and constant interference, particularly on the Outback where rear hatch movement is tight.

    Adjustable bars also help when you regularly switch gear. Bike trays, ski racks, cargo boxes, and utility carriers often require different spacing. Aftermarket systems reduce the need to compromise positioning each time equipment changes.

    One tradeoff to consider is wind noise, which can vary depending on bar shape, spacing, and how often the system stays installed.

    Heavier or wider carriers may benefit from the added rigidity of aftermarket systems. While still limited by the vehicle’s roof rating, a more robust bar setup can reduce flex and improve stability at highway speeds.

    If your setup demands precise fit, frequent gear changes, or improved load stability, aftermarket crossbars provide control factory rails are not designed to offer.

    Many Subaru owners upgrade to aftermarket crossbars for better cargo box positioning, stronger load support, and quieter highway driving.

    Some widely used options include:

    Thule WingBar Evo Crossbars (Amazon | REI)

    Yakima JetStream Crossbars (Amazon | REI)

    Rhino-Rack Vortex Crossbars (Amazon | REI)

    These systems typically offer wider bar spread and stronger mounting systems than factory crossbars, which improves cargo box placement and overall stability.

    Key Differences That Actually Affect Daily Use

    Hatch Clearance & Positioning

    Rear hatch clearance is one of the most common fit issues Subaru owners encounter after installing roof gear. A carrier may technically fit the roof but still interfere with the hatch if it sits too far back, turning everyday access into a repeated frustration.

    Positioning matters more than overall carrier length. On Outback models especially, the hatch swings up and forward, so anything extending past the rear crossbar becomes a problem quickly. Keeping the rear edge of a cargo box at or slightly ahead of the rear crossbar usually preserves clearance.

    Crossbar spacing and mounting slot range determine how far forward a carrier can sit. Limited adjustment often forces longer carriers rearward, while adjustable setups allow better positioning and fewer clearance issues.

    This is one of the biggest factors in preventing hatch interference, especially on the Outback where rear clearance is tight.

    Factory crossbars can limit how far forward a cargo box can sit, which can create hatch clearance issues on vehicles like the Subaru Outback. Boxes with longer mounting tracks, such as the Thule Motion XT M (Amazon | REI) or Yakima SkyBox 16 Carbonite (Amazon | REI), usually provide more flexibility with fixed bar spacing.

    Perfect alignment matters less than daily usability. A setup that allows the hatch to open fully every time is far easier to live with.

    Noise & MPG Impact

    Any roof-mounted setup changes how air moves over the vehicle, showing up as added wind noise and reduced fuel economy. These effects are modest on a single trip but become noticeable when the system stays installed during daily driving.

    Noise increases when airflow is disrupted around crossbars and carriers. Integrated factory bars tend to be quieter when not in use, while wider crossbars and exposed gear can introduce a steady hum at highway speeds. Aero-shaped aftermarket bars can reduce noise, but mounting position and load shape still matter.

    Fuel economy drops because added drag forces the engine to work harder at highway speeds. Taller carriers, wider loads, and exposed gear increase this effect. Lower-profile setups and removing carriers when not in use help limit the penalty.

    The practical decision comes down to tolerance. If roof gear stays installed frequently, minimizing noise and drag improves daily comfort. If used only for trips, the tradeoff is usually acceptable.

    Load Flexibility

    Load flexibility refers to how easily your roof setup adapts to different gear sizes, weights, and mounting needs. For many Subaru owners, this becomes more important over time than the initial installation.

    Factory rails work well for common loads such as mid-size cargo boxes, bike racks, and light recreational gear. Their fixed spacing keeps setup simple but limits adjustment for unusual or oversized items.

    Aftermarket crossbars expand flexibility within the vehicle’s weight limits. Adjustable spacing allows better support for longer boxes, wider carriers, and equipment requiring specific mounting distances — especially useful if you frequently swap gear.

    That added flexibility is often what improves cargo box positioning and overall usability.

    More flexibility also means more setup decisions. If your roof use rarely changes, factory rails are usually sufficient. If your gear varies by season or trip type, adjustable crossbars make adaptation easier.

    Cost & Complexity in Real Use

    Factory roof rails keep costs low because they are already part of the vehicle. For many owners, they work without additional purchases, extra hardware, or time spent adjusting fit. Once set, they require minimal maintenance beyond occasional checks.

    Aftermarket crossbars add flexibility but introduce upfront cost and setup time. You may also need mounting kits, locks, or accessories depending on your gear. Initial alignment and spacing adjustments can take longer than expected.

    Complexity continues over time. Adjustable systems require periodic re-tightening and re-measuring when swapping gear. Removing and reinstalling bars adds steps that factory systems avoid. None of this is difficult, but it adds friction compared to a fixed setup.

    The practical question is how often you benefit from the added flexibility. If your setup rarely changes, factory rails minimize cost and effort. If you frequently carry different gear or need precise positioning, the extra investment can pay off in usability.

    Which Setup Makes Sense for Your Subaru?

    The right setup depends less on the vehicle and more on how you use it. Crosstrek, Forester, and Outback roofs can support typical cargo needs with factory rails, but daily driving habits, gear size, and trip frequency determine whether that simplicity is enough.

    Factory rails make sense if your roof setup stays consistent. They work well for mid-size cargo boxes, occasional trips, and lighter recreational gear. If you value quick installation, minimal adjustment, and a system that stays out of your way, the factory setup is usually sufficient.

    Aftermarket crossbars become worthwhile when fit and flexibility start to matter. Larger cargo boxes, carriers requiring specific spacing, or frequent gear swaps benefit from adjustable placement. If you routinely carry different loads or need precise positioning for hatch clearance, the added control improves usability.

    It also helps to consider how often the system will stay installed. A simple setup is easier to live with when used occasionally, while a more adjustable system pays off when roof storage is part of regular use.

    There isn’t a universally better choice. The best setup matches how often you carry gear, how sensitive your fit requirements are, and how much time you want to spend managing adjustments.

    FAQs — Subaru Factory Roof Rails vs Aftermarket Crossbars

    Do I need aftermarket crossbars to install a cargo box on my Subaru?

    Not usually. Most mid-size cargo boxes mount securely to factory rails. Aftermarket bars become helpful when you need more forward positioning range, wider spacing, or support for longer boxes.

    Will aftermarket crossbars improve rear hatch clearance?

    They can. Adjustable spacing allows the box to sit farther forward, which often solves hatch interference that factory bar spacing cannot.

    Are factory roof rails strong enough for heavier gear?

    Yes, within the vehicle’s roof weight rating. The limitation is typically positioning flexibility and stability with larger gear, not structural strength.

    Will switching to aftermarket bars make my Subaru noisier?

    It depends on bar shape. Aero-style bars are usually quiet, while round or square bars can create more wind noise, especially when left installed without a load.

    Can I leave aftermarket crossbars on all the time?

    Yes, but many owners remove them when not in use to reduce wind noise and drag. If they stay on full time, bar shape and placement affect daily comfort.

    Do Crosstrek and Forester owners face the same limitations as Outback owners?

    Similar issues apply, but the Outback’s hatch geometry and built-in crossbar spacing make positioning more sensitive. Crosstrek and Forester setups may be slightly more forgiving.

    Is upgrading to aftermarket crossbars worth it if I only take a few trips a year?

    Usually not. Factory rails are simpler and adequate for occasional use. Aftermarket bars make more sense when you need precise fit control or carry gear frequently.

    Final thoughts

    Factory roof rails and aftermarket crossbars are both capable systems, but they are built with different priorities. One favors simplicity and everyday convenience, while the other adds adjustability and control. Neither is inherently better; each solves a different set of problems.

    For many Crosstrek, Forester, and Outback owners, factory rails handle typical travel needs without added cost or setup time. Aftermarket crossbars become valuable when positioning flexibility, frequent gear changes, or stability with larger carriers begins to matter.

    Every setup involves tradeoffs. More adjustability often means more cost and setup effort. Simpler systems reduce friction but limit fine-tuning. Noise, hatch clearance, and installation time are factors to balance based on how often roof storage is used.

    The most practical choice is the one that fits your driving patterns, gear needs, and tolerance for adjustment. When the setup matches how you actually use your Subaru, it fades into the background and does its job without constant attention.

    From here, evaluating bar shapes, spacing options, and fit considerations becomes easier. Future guides will look more closely at those gear-level decisions to help refine a setup that works smoothly with your vehicle and routine.

    If you’re refining your setup further: